Warning: Deprecated articles
You are using the old version of the knowledge base for yunIO.
Make sure to use the samples within the new HelpCenter for yunIO.
The following article shows how to use yunIO with Microsoft Power Automate to create multiple items in SAP with one service call.
Power Automate is a cloud-based process automation service provided by Microsoft. For more Information on Power Automate see Microsoft Power Automate Documentation.
About #
The depicted example scenario creates multiple cost centers in the SAP cost center master data. This article guides you through the following process:
- Create a yunIO service that can handle multiple input values.
- Create multiple data sets and that can be used as an input for the yunIO service.
In this example, multiple items are passed to the SAP function via an Excel spreadsheet. Other options are SharePoint lists, a Power App with Gallery Control for multiple line items, a Nintex Form with a repeating section and others. - Create a Power Automate workflow that reads and processes data from the input table to run the yunIO service.
Creating a Service in yunIO #
Create a yunIO service that creates cost centers in the SAP cost center master data.
Note: The parameters that are needed to create cost centers are dependent on your customized SAP settings.
- Create a service in yunIO. For this example we use the BAPI_COSTCENTER_CREATEMULTIPLE to create multiple cost centers in SAP.
- Activate Commit Transaction in the Advanced Settings of the service.
This option is mandatory when using BAPI_COSTCENTER_CREATEMULTIPLE.
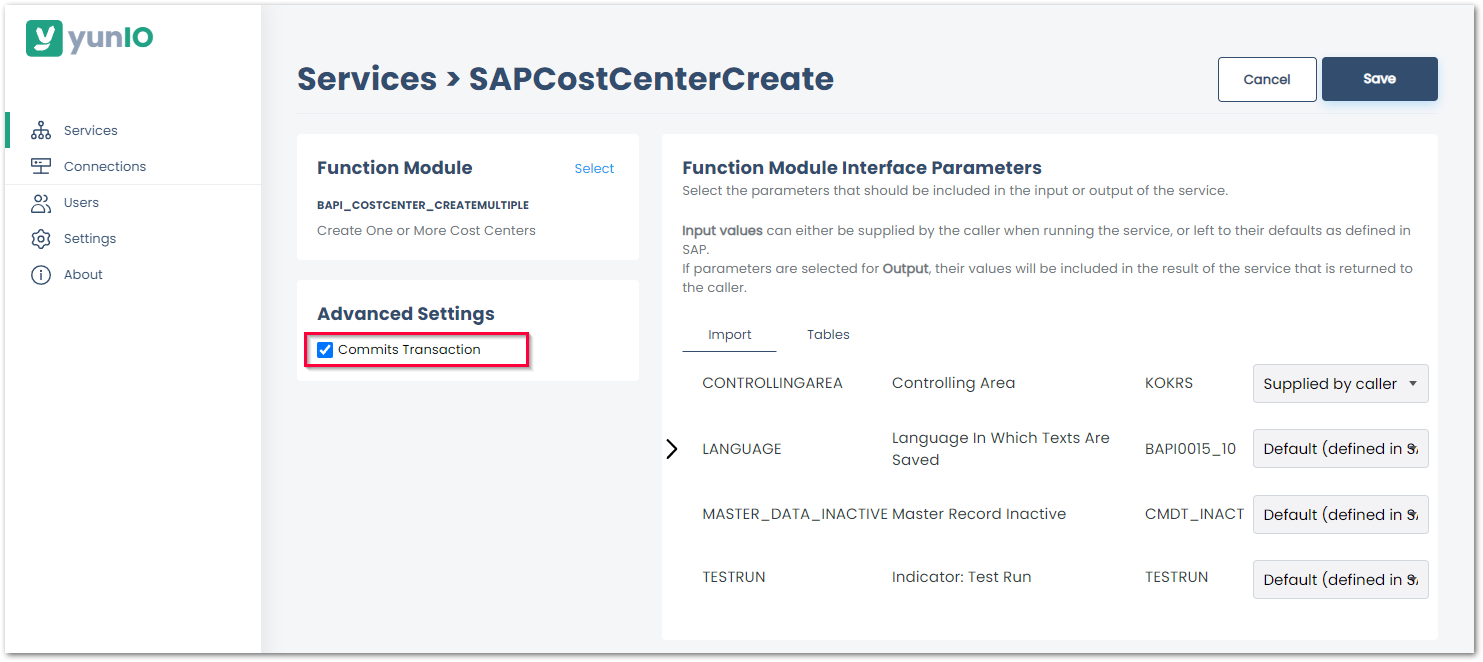
- Set the Import Parameter CONTROLLINGAREA to Supplied by Caller.
- Select the table RETURN for the output. The data in this table can be used for exception handling.
- Set the following items of the table COSTCENTERLIST to Supplied by Caller:
- COSTCENTER
- VALID_FROM
- VALID_TO
- PERSON_IN_CHARGE
- COSTCENTER_TYPE
- COSTCTR_HIER_GRP
- COMP_CODE
- CURRENCY
- CURRENCY_ISO
- PROFIT_CTR
- NAME
- COSTCENTER
- Click
 to testrun the service in yunIO (1). For more information, see Online Help: Testing a Service.
 - Click
 to download the service definition (2).

Configuring a yunIO Custom Connector in Power Automate #
To use the service created in Creating a Service in yunIO with Power Apps, it must be available as a custom connector in Power Automate. For information on how to integrate a yunIO service with Power Automate, see Integrating a yunIO Service with Power Automate.
Note: When integrating services from a local yunIO installation with a cloud hosted platform like Power Automate, a gateway to tunnel the connection is recommended, e.g., the Microsoft On-premises data gateway. For more information about yunIO networking settings, see yunIO Networking Scenarios.
Creating Input Data #
- Create data sets that include values for all fields in the table COSTCENTERLIST that are set to Supplied by Caller in the yunIO service.
If needed, download a sample EXCEL file (.xlsx). - Upload the data sets to the SharePoint document library or any other location that is accessible for Power Automate.
Creating a Power Automate Flow for Multiple Items #
The following workflow reads and processes data from a table and to create new cost centers in the SAP cost center master data.
- Create a new workflow.
- Add a manual trigger to test the workflow when necessary.
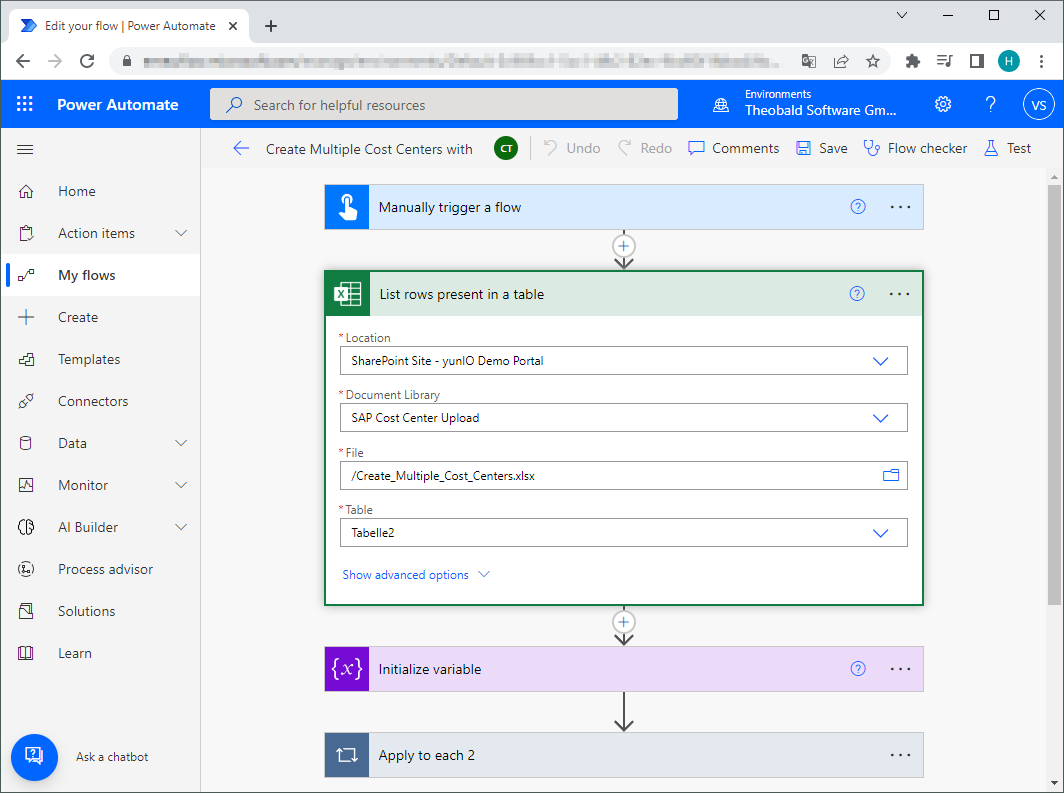
- Add a List rows present in table action to read the input data for the yunIO service. In this example, the data is hosted on SharePoint, see Creating Input Data.
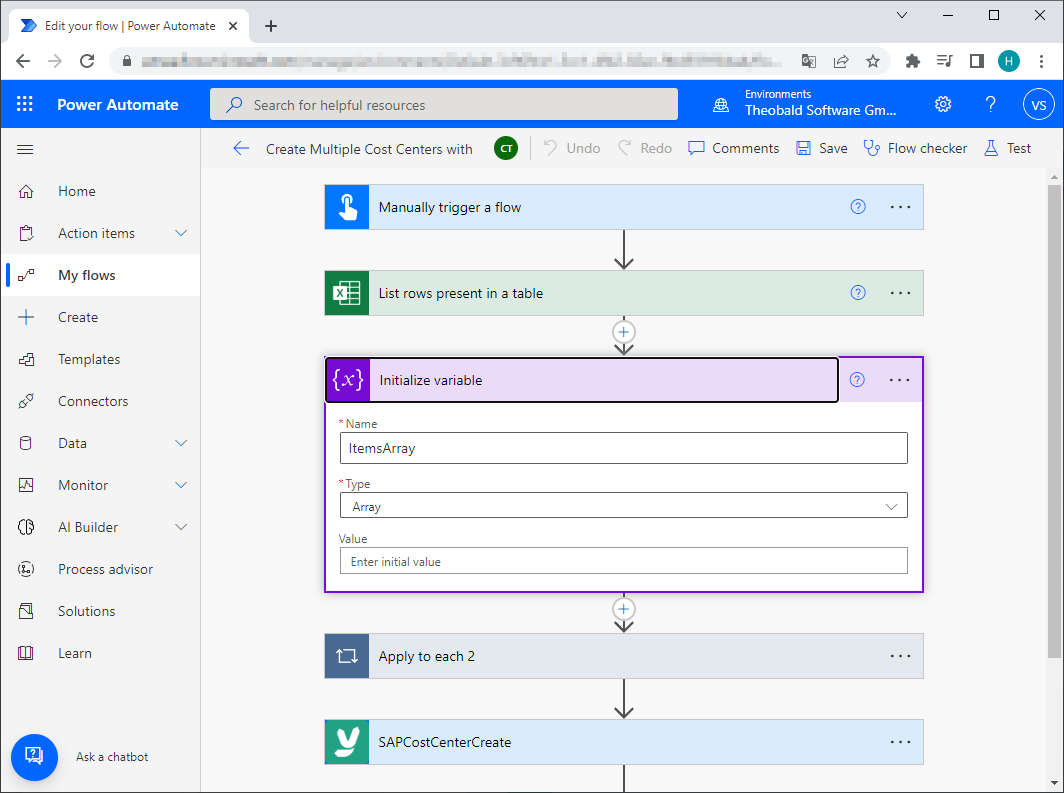
- Add an Initialize variable action to create an array that can store multiple items. Leave Value empty.
- Add an Apply to each action to incrementally fill the initialized array with input data. Select the list of items from the SharePoint table as the input for the Apply to each action.
- Add a Compose action to Apply to each.
Use Compose to create the body of the yunIO web service that contains the table parameters and to map the input data.
{
  "COSTCENTER": "",
  "VALID_FROM": "",
  "VALID_TO": "",
  "PERSON_IN_CHARGE": "",
  "COSTCENTER_TYPE": "",
  "COSTCTR_HIER_GRP": "",
  "COMP_CODE": "",
  "PROFIT_CTR": "",
  "NAME": ""
}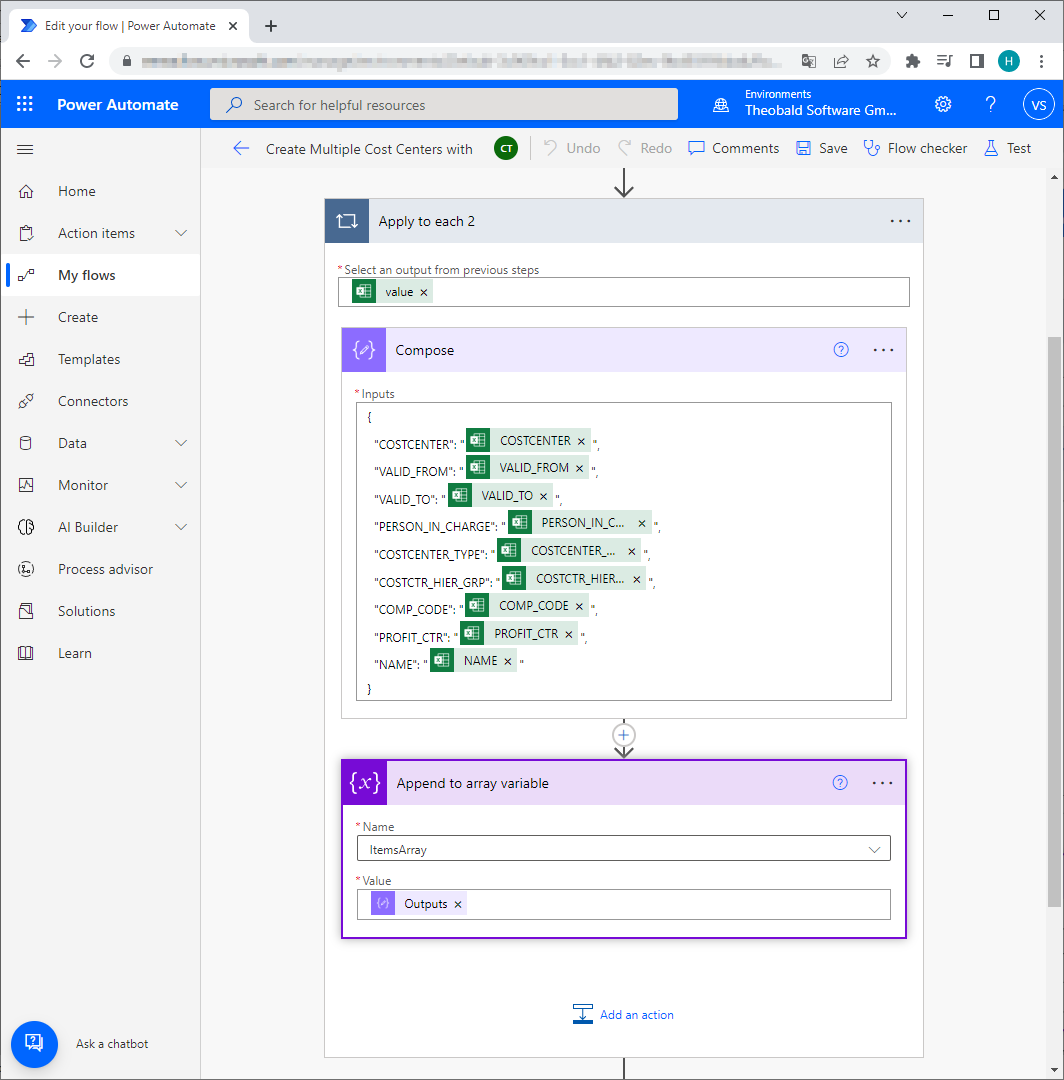
- Add an Append to array variable action to Apply to each. Select the initialized array and add the output of the Compose action to Value.
- Add the yunIO custom connector for creating cost centers after the Apply to each action.
Enter a value for the import parameter CONTROLLINGAREA and assign the filled array variable to the table parameter COSTCENTERLIST.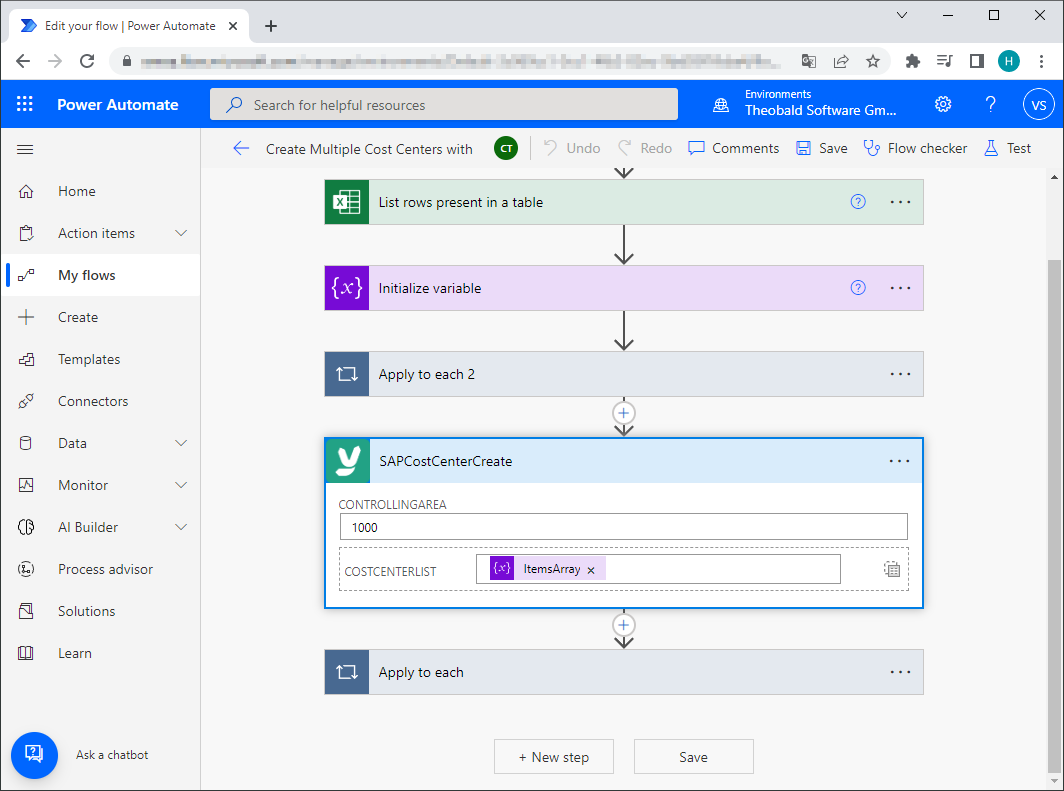
- Optional: Add an email notification action to get notified about the newly created cost centers.
- Test the workflow.
Check if the workflow steps are successfully executed one after the other.
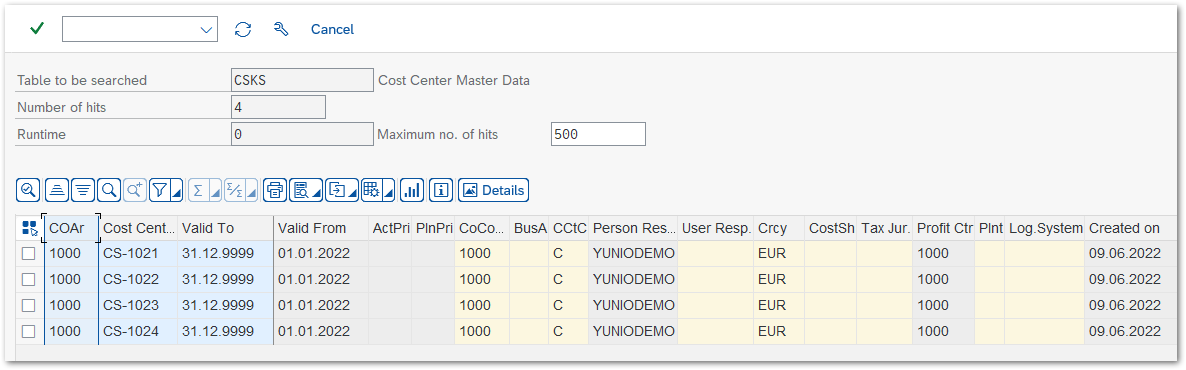
Check if the cost centers from the input data sets are created in SAP (table CSKS).