Warning: Deprecated articles
You are using the old version of the knowledge base for yunIO.
Make sure to use the samples within the new HelpCenter for yunIO.
This article shows how to synchronize a Salesforce account in near-real time with SAP.
In the following scenario, data from Salesforce is used to automatically create a customer account in SAP.
The newly created SAP customer number is then written back to Salesforce.
About #
This article leads you through all necessary steps to set up the following process:
- When an account in the Sales Console of Salesforce is modified, a Power Automate workflow is triggered.
- The workflow checks if the type of the account is set to Customer - Direct and if the customer exists in SAP.
- If both conditions are true, a yunIO service that writes customer data from Salesforce to SAP is executed.
- When the customer is created in SAP, the new SAP customer number is written back to the Salesforce sales account.
Setup in yunIO #
yunIO is the connector that reads and writes data from and to SAP. For more information on yunIO, see Theobald Software: yunIO.
- Define a connection to your SAP system in yunIO.
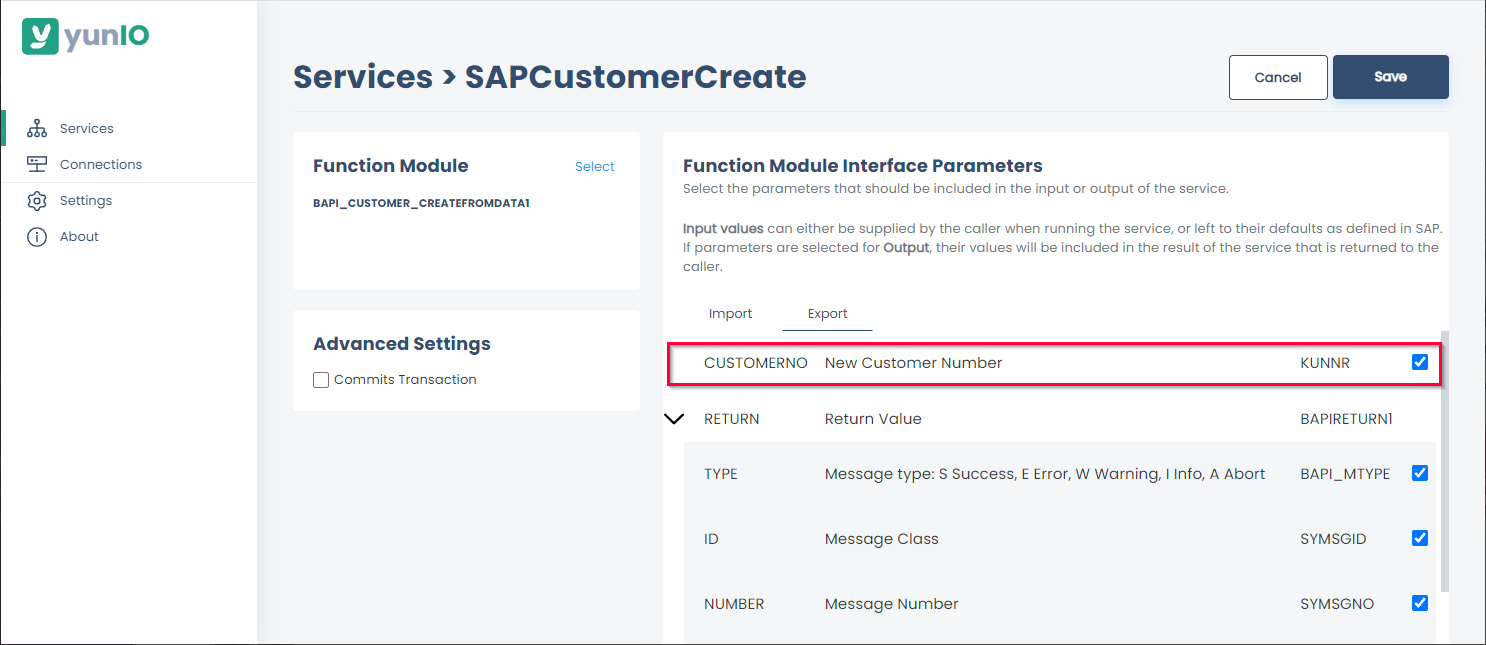
- Create a new service in yunIO. The depicted example uses the integration type Function Module for the service.
- Look up the standard BAPI BAPI_CUSTOMER_CREATEFROMDATA1 that creates customers in SAP.
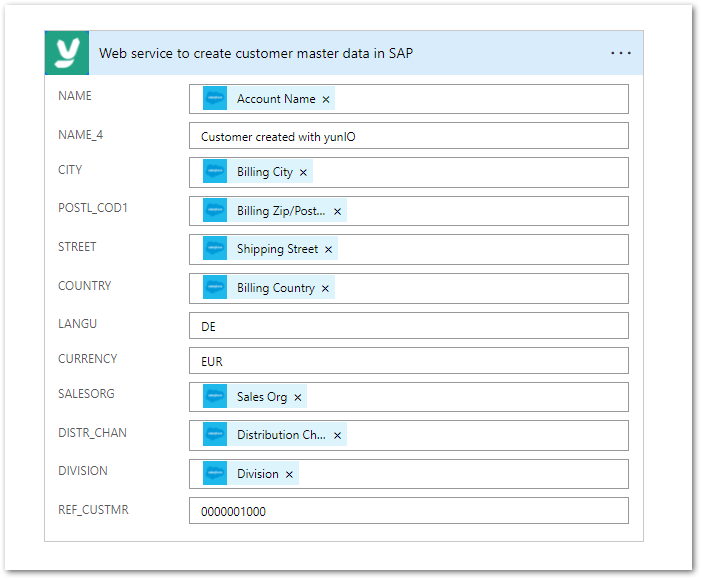
- Set all import parameters you want to transfer from Salesforce to SAP to Supplied by Caller e.g., NAME, CITY, POSTL_COD1, STREET, etc.
- Select CUSTOMERNO for export. This Export parameter contains the newly created SAP customer number that is written back to Salesforce.
- Click
 to testrun the service in yunIO (1). For more information, see Online Help: Testing a Service.
 - Click
 to download the service definition (2).

Setup in Salesforce #
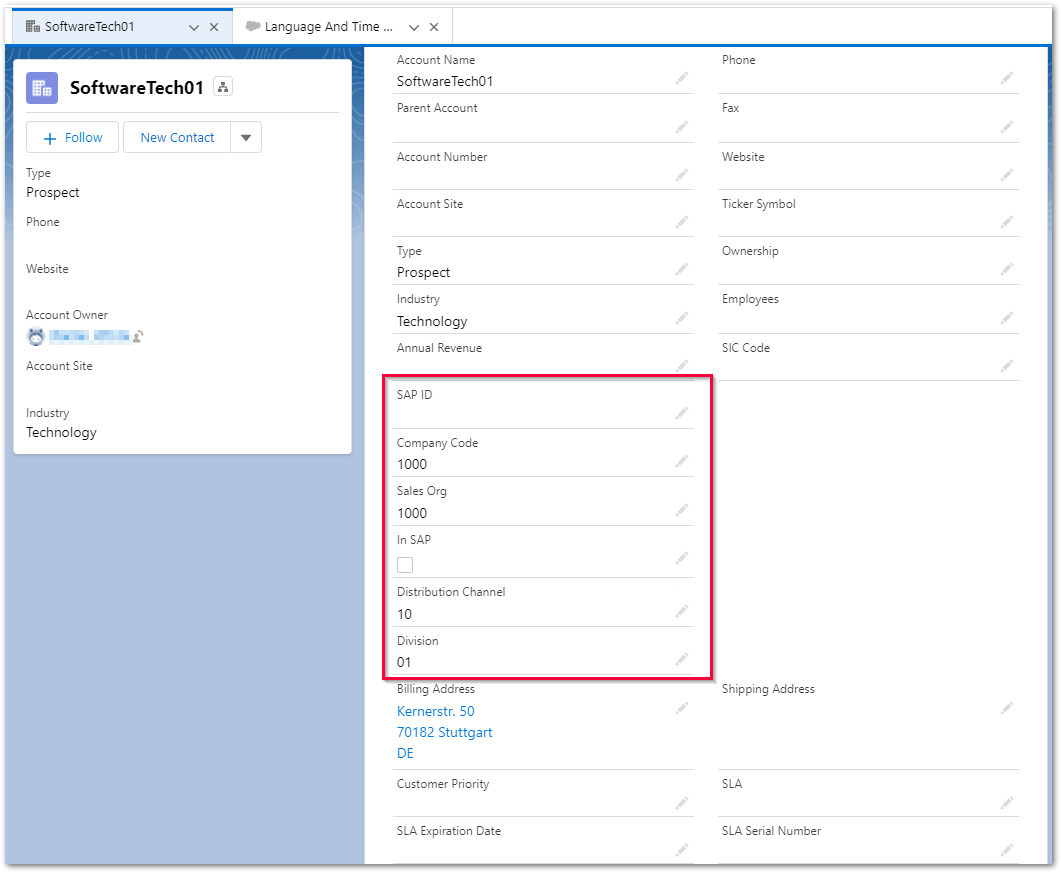
Customize your Salesforce account to provide SAP-related fields:
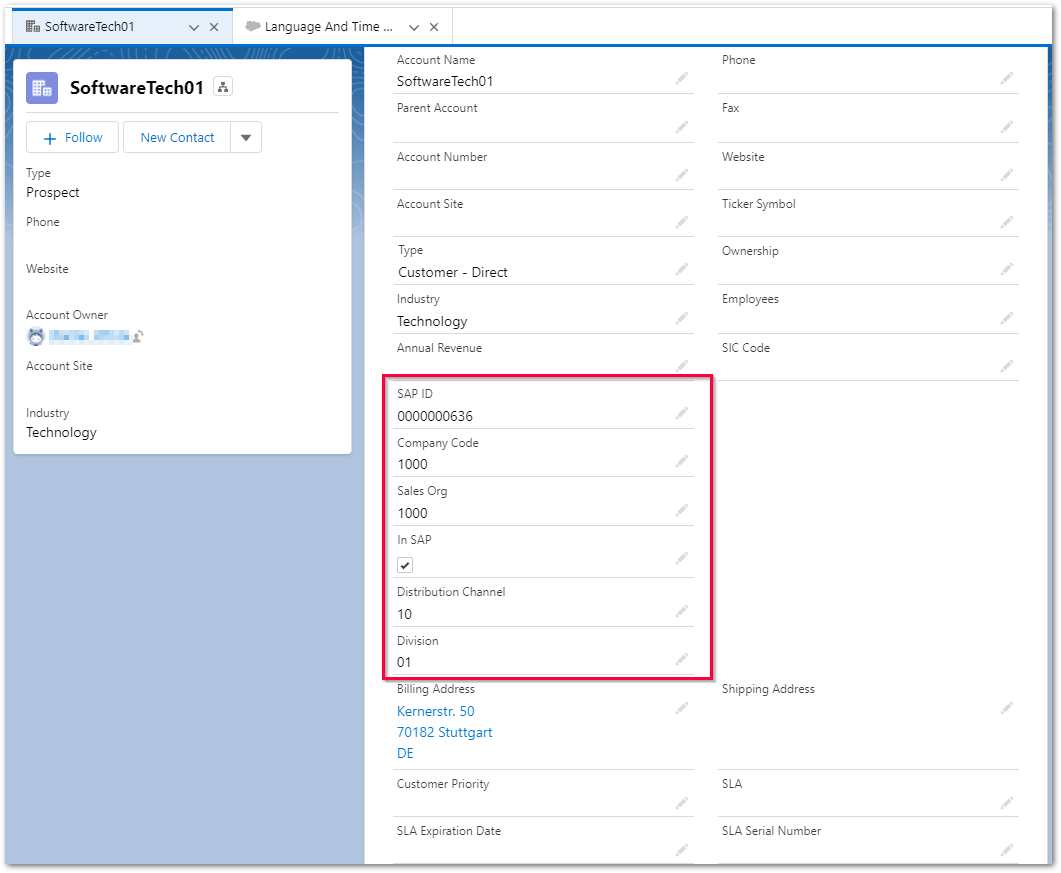
- Create a field SAP ID. Once a customer is created in SAP, the customer number is written back into SAP ID.
- Company Code, Sales Org, Distribution Channel and Division are organization details required to create the SAP customer.
- Create a checkbox that indicates if the customer exists in SAP.
For more information on how to customize fields in Salesforce, see Salesforce Documentation: Create Custom Fields.
Note: Creating Company Code, Sales Org, Distribution Channel and Division in Salesforce is optional as they can also be set as static values in Power Automate.
Setup in Power Automate #
- Integrate the yunIO service created in Setup in yunIO as a Custom Connector in Power Automate, see Integrating a yunIO Service with Power Automate.
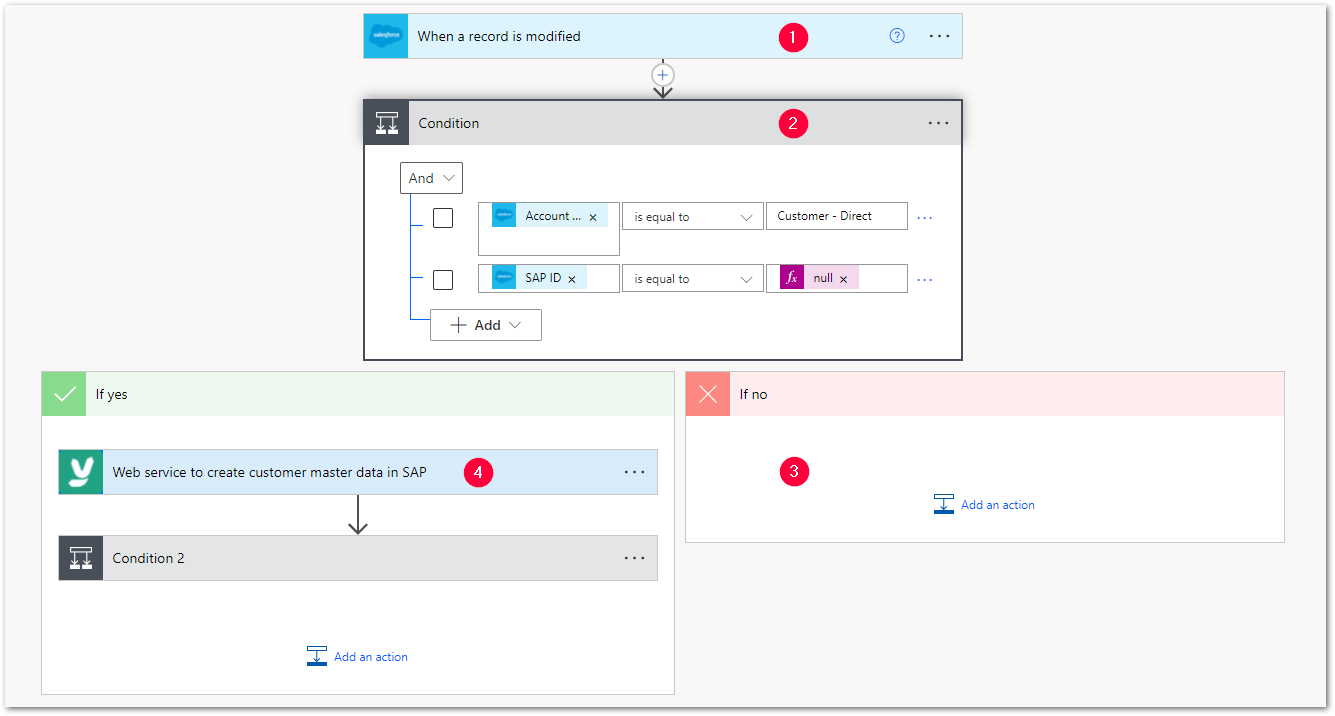
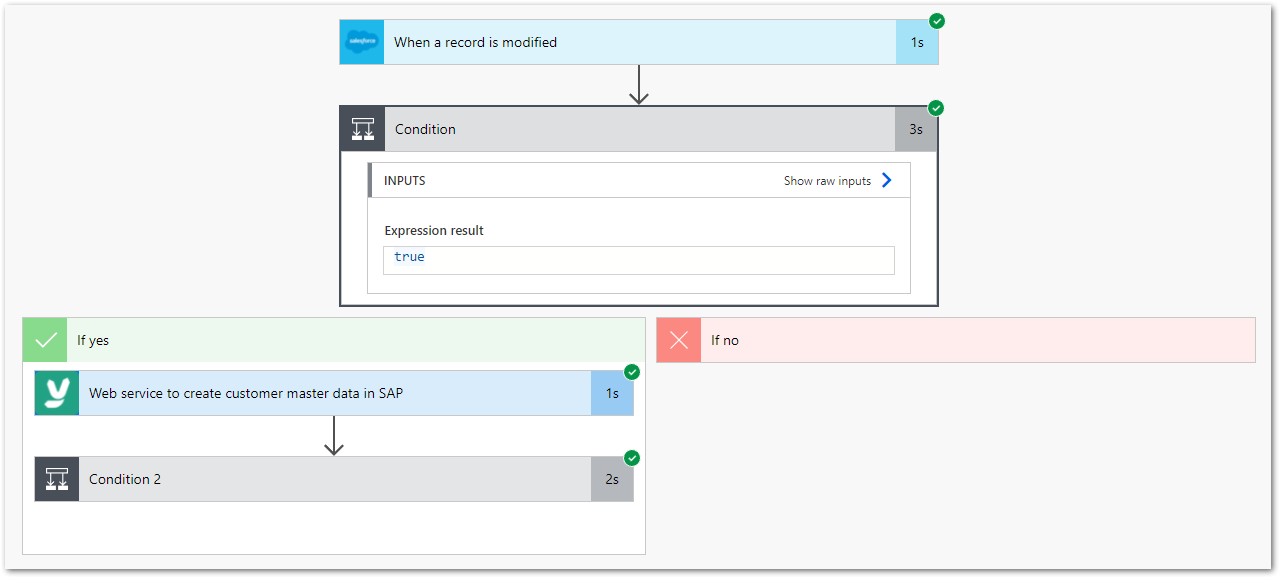
- Create a new workflow that is triggered when a Salesforce account is modified (1).
- Check if the account type in Salesforce is set to Customer - Direct and if the customer does not yet exist in SAP (2).
If one or both conditions are false, end the workflow (3). If both conditions are true, execute the yunIO service to write the customer data to SAP (4).
- Add the yunIO connector created in step 1 to the workflow and map the customer data from Salesforce to the input parameters of yunIO.
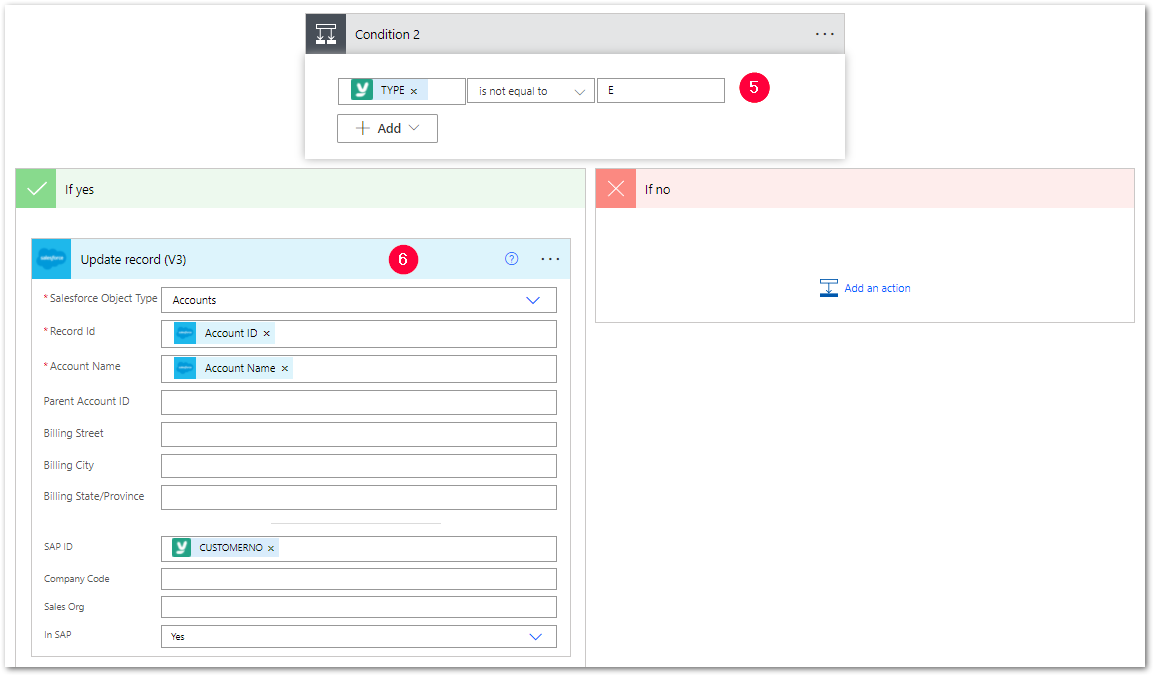
- Check if the SAP customer was created using the yunIO return field TYPE (5).
If TYPE does not equal ‘E’ (error), the SAP customer number is written back to Salesforce. - When updating the Salesforce account (6), assign the CUSTOMERNO from yunIO to SAP ID and set the checkbox In SAP to ‘Yes’.
- Optional: Send notifications when a customer is created or log all synchronized Salesforce accounts e.g., in a SharePoint Online list.
- Turn on the workflow.
Triggering the Process #
- Open Salesforce and change the account type from Prospect to Customer - Direct. Make sure that the checkbox In SAP is deactivated.
- The Power Automate workflow runs and creates the customer in SAP.
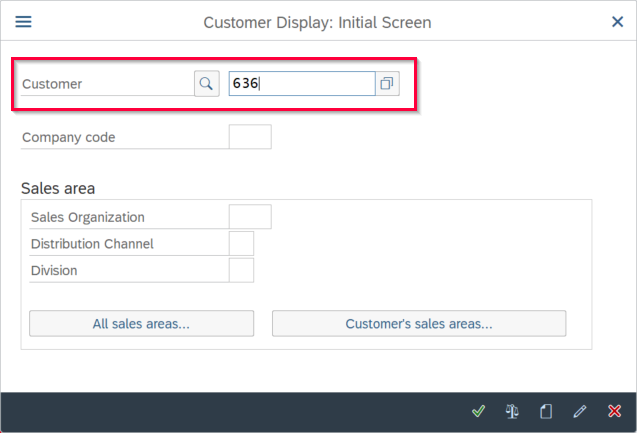
- Check if the SAP customer number is set in Salesforce and if the checkbox In SAP is active.
- Open SAP and look up the customer using the transaction xd03. Enter the customer number from Salesforce to look up the customer.