Warning: Deprecated articles
You are using the old version of the knowledge base for yunIO.
Make sure to use the samples within the new HelpCenter for yunIO.
The following article shows how to install an X.509 certificate for Transport encryption.
The installation of an X.509 certificate is required to use Transport Layer Security (TLS) and secure authentication with yunIO.
About X.509 Certificates #
There are two approaches for creating an X.509 certificate:
- Certificate released by an (internal) certification authority (CA)
- Self-signed certificate
Note: On test environments you can use a self-signed certificate. For production environment it is recommended to use a certificate released by an (internal) certificate authority (CA).
Create an X.509 Certificate #
Have a TLS certificate issued by your IT network team considering the following points:
- The certificate property “Subject Alternative Name” contains the DNS name of the server that runs the yunIO Windows service.
- Place the certificate in the Windows Certificate Store on the machine that runs the yunIO Windows service.
- The certificate common name (CN) attribute contains the DNS name of the server.
Tip: To display the Common Name (CN) of the certificate, double-click on the certificate in the Cetrificate Manager and navigate to the Details tab.
Note: The Windows Certificate Store works with most browsers. Note that Mozilla Firefox offers its own certificate storage.
Configure your Firefox browser to trust certificates in the Windows certificate store or import the certificate via an enterprise ploicy, see Mozilla Support: Setting Up Certificate Authorities (CAs) in Firefox.
Import an X.509 Certificate #
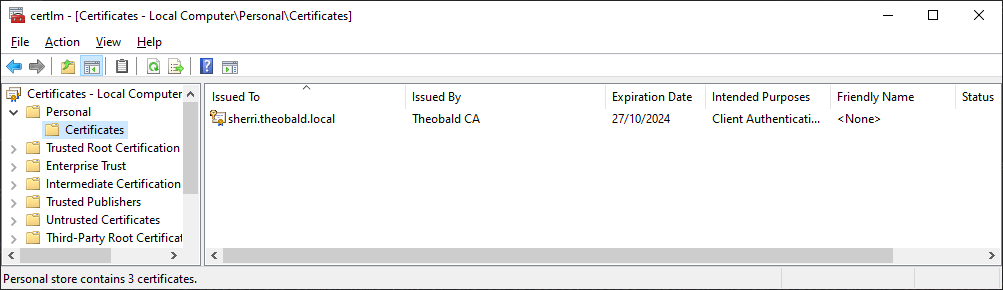
- Import the certificate to the Windows Certificate Store using Microsoft Management Console (mmc).
In the example shown, the server name is “sherri”:
- Open the yunIO Designer and navigate to the Settings menu.
- Click [Pick Certificate] to reference the X.509 certificate.
Information about the currently saved certificate is displayed in the Transport Layer Security section of the menu.
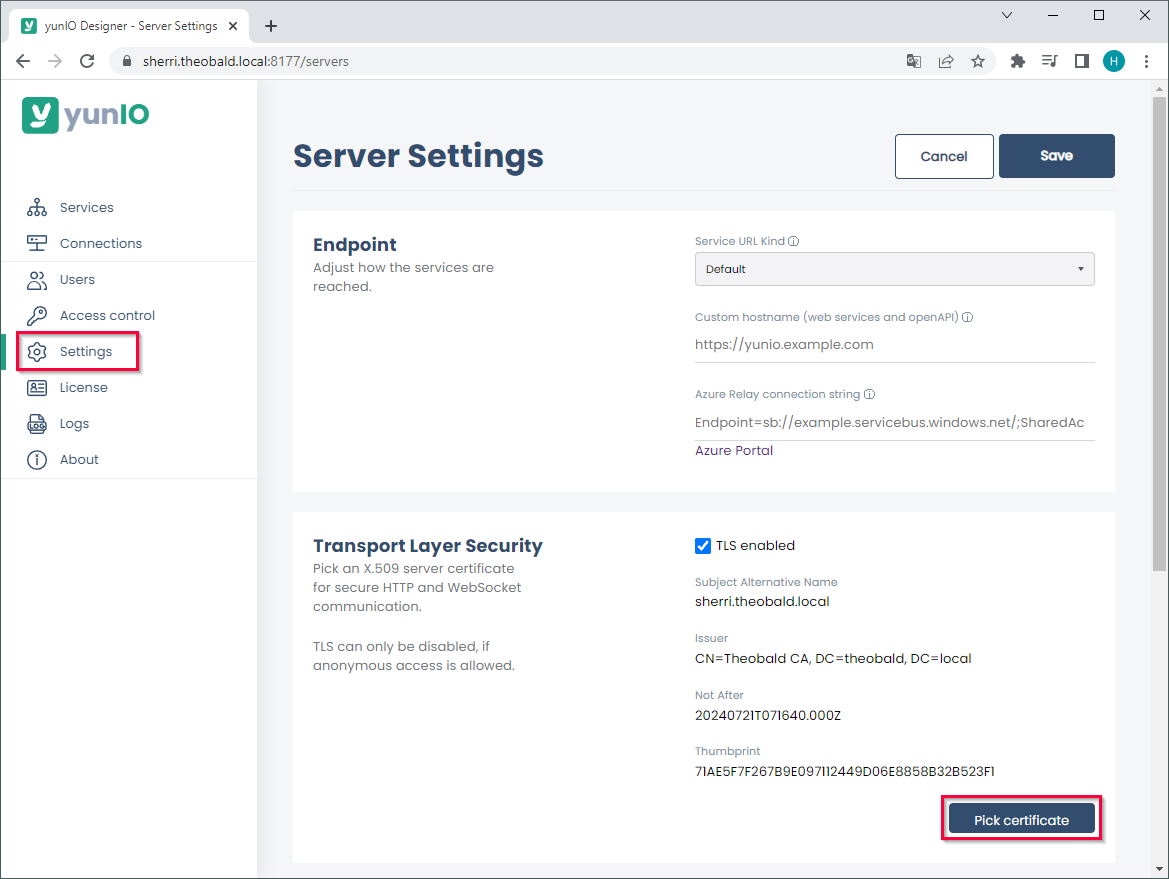
- Click Enable TLS to activate Transport Layer Security, see Online Help: yunIO - Server Settings.
- Click [Save] and restart the yunIO Windows service to implement the changes.
The yunIO Designer and the services created in yunIO are now accessible via https protocol.