Warning: Deprecated articles
You are using the old version of the knowledge base for yunIO.
Make sure to use the samples within the new HelpCenter for yunIO.
The following article shows how to synchronize a Nintex form for Office 365 with SAP using custom JavaScript.
In the depicted scenario, SAP data is made available in a Nintex form for data selection in dropdown lists using JavaScript and REST services.
For more information on Nintex form for Office 365, see Nintex Documentation: Office 365 Forms.
About #
This article leads you through all necessary steps to set up the following process in Nintex for Office 365:
- When an SAP employee name is entered in an input field, all possible hits are displayed in a dropdown list.
- If an employee is selected in the drop-down list, the name and personnel number is displayed in a text field.
- When the input is confirmed, the personnel data of the selected employee is written to SharePoint.
Setup in yunIO #
yunIO is the connector that reads and writes data from and to SAP. For more information on yunIO, see Theobald Software: yunIO.
- Define a connection to your SAP system in yunIO.
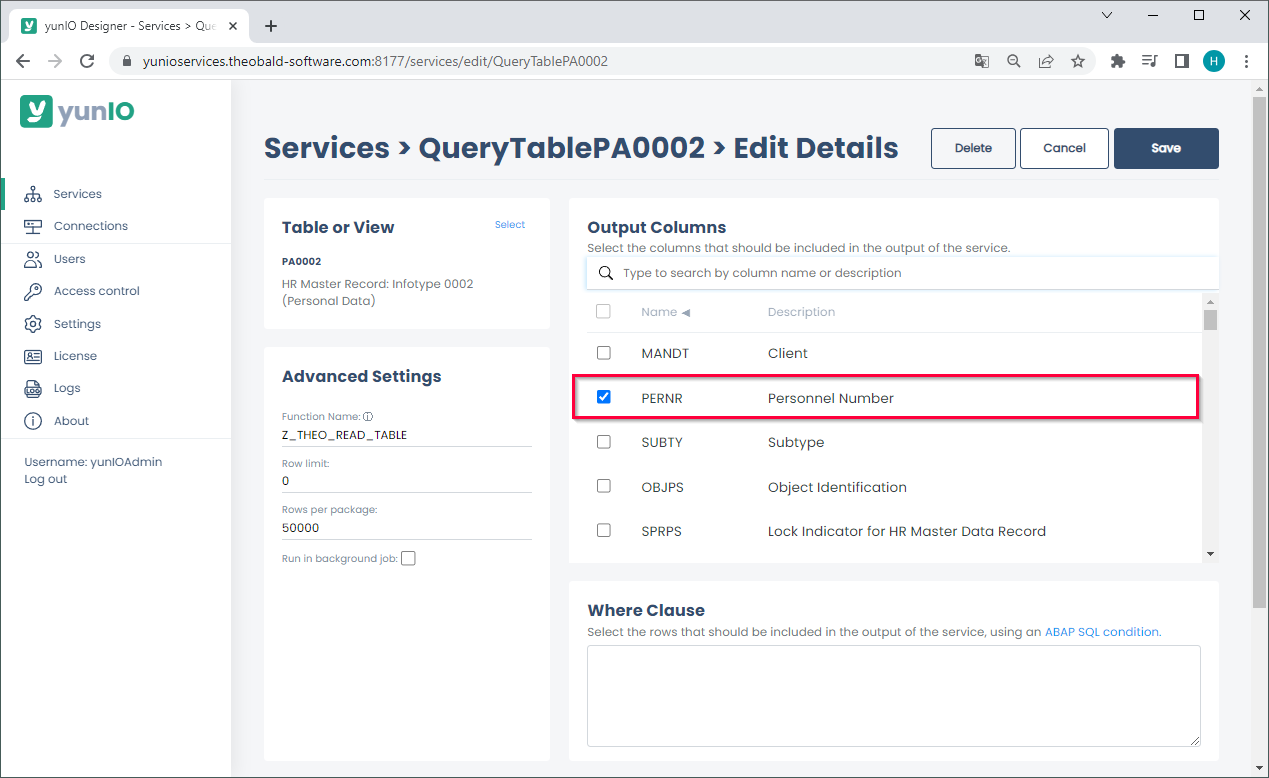
- Create a new service in yunIO. The depicted example uses the integration type SAP Table or View for the service.
- Look up the table PA0002 that contains HR master data.
- Select the columns PERNR, NACHN and VORNA for the output of the service.
- Click
 to testrun the service in yunIO (1). For more information, see Online Help: Testing a Service.
 - Click
 to download the service definition (2).

Setup in SharePoint #
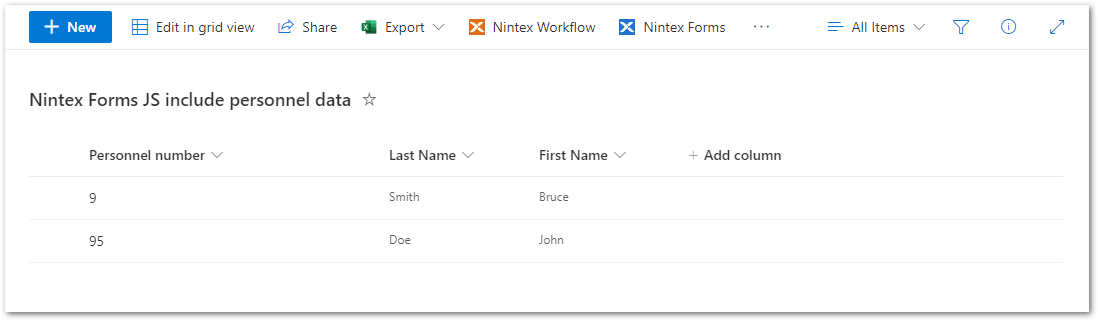
In the depicted example, SAP employee data is added to a custom SharePoint list via a Nintex form:
- Create a SharePoint custom list with a column “Personnel Number”, “Last Name” and “First Name”.
- Click [Nintex Forms] to create a new Nintex input form for the SharePoint custom list, see Setup in Nintex for Office 365.
Setup in Nintex for Office 365 #
Follow the steps below to set up the Nintex form for the SharePoint custom list created in the section Setup in SharePoint:
- Create a new Nintex form:
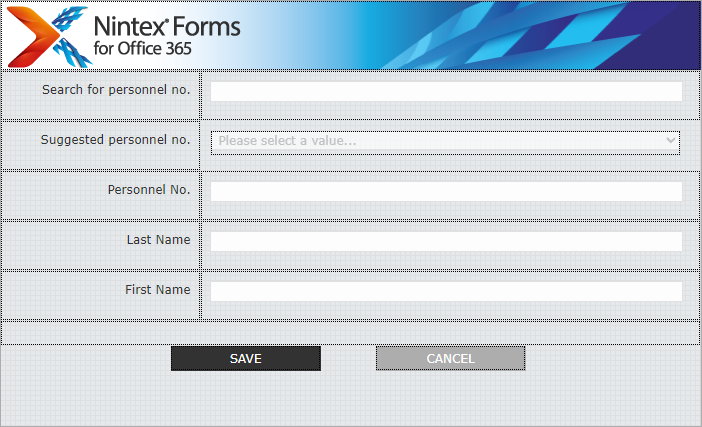
- Define the following text fields:
- “Search for personnel no.” of type Single Line Textbox is the input field that contains the personnel number.
- “Suggested personnel no.” of type Choice displays the possible hits for the personnel number in a dropdown list.
- “Personnel No.” of type Single Line Textbox displays the personnel number of the selected employee.
- “Last Name” of type Single Line Textbox displays the last name of the selected employee.
- “First Name” of type Single Line Textbox displays the first name of the selected employee.
- Open the advanced settings of the field “Search for personnel no.” and set Store Client ID in JavaScript Variable to Yes.
- In the field Client ID JavaScript variable name enter the variable name “inputPerNr”.
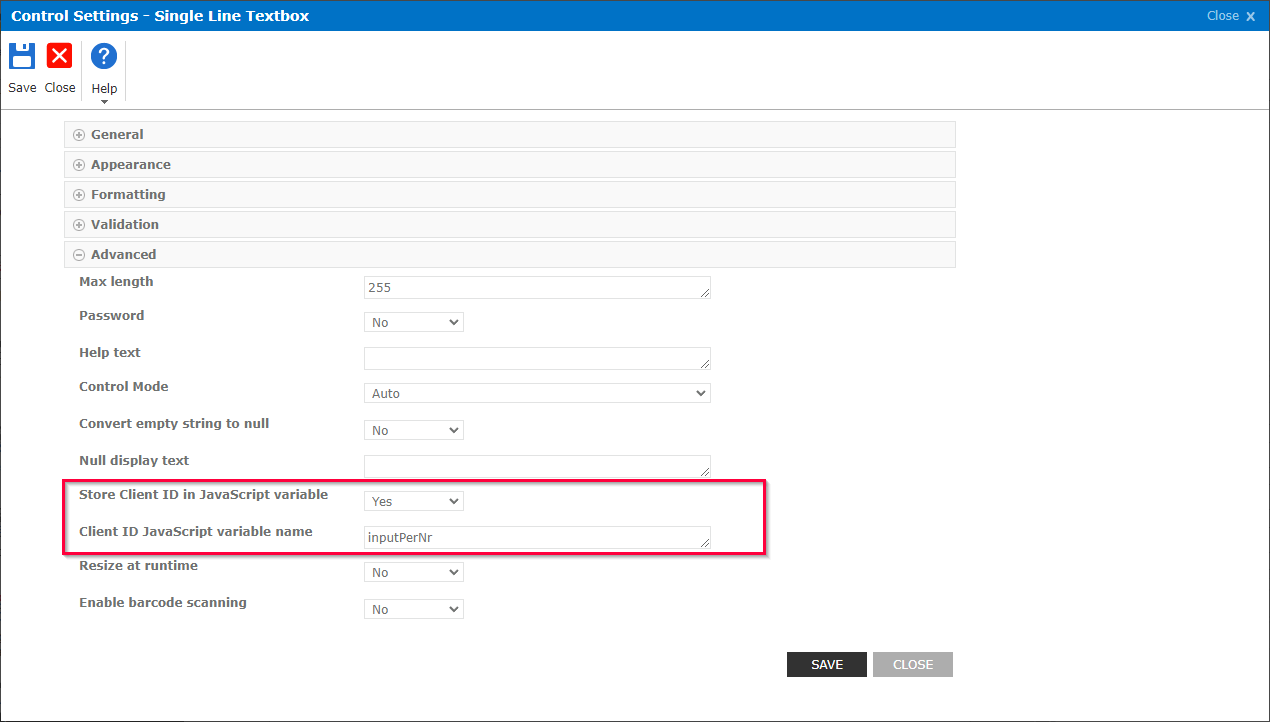
- Click [Save].
- Open the general settings of the field “Suggested personnel no.” and set Display format to Drop down list.
- In the field Choices enter “no matches”. This input will be overwritten via JavaScript.
- Open the advanced settings of the field “Suggested personnel no.” and set Store Client ID in JavaScript Variable to Yes.
- In the field Client ID JavaScript variable name enter the variable name “selectPerNr”.
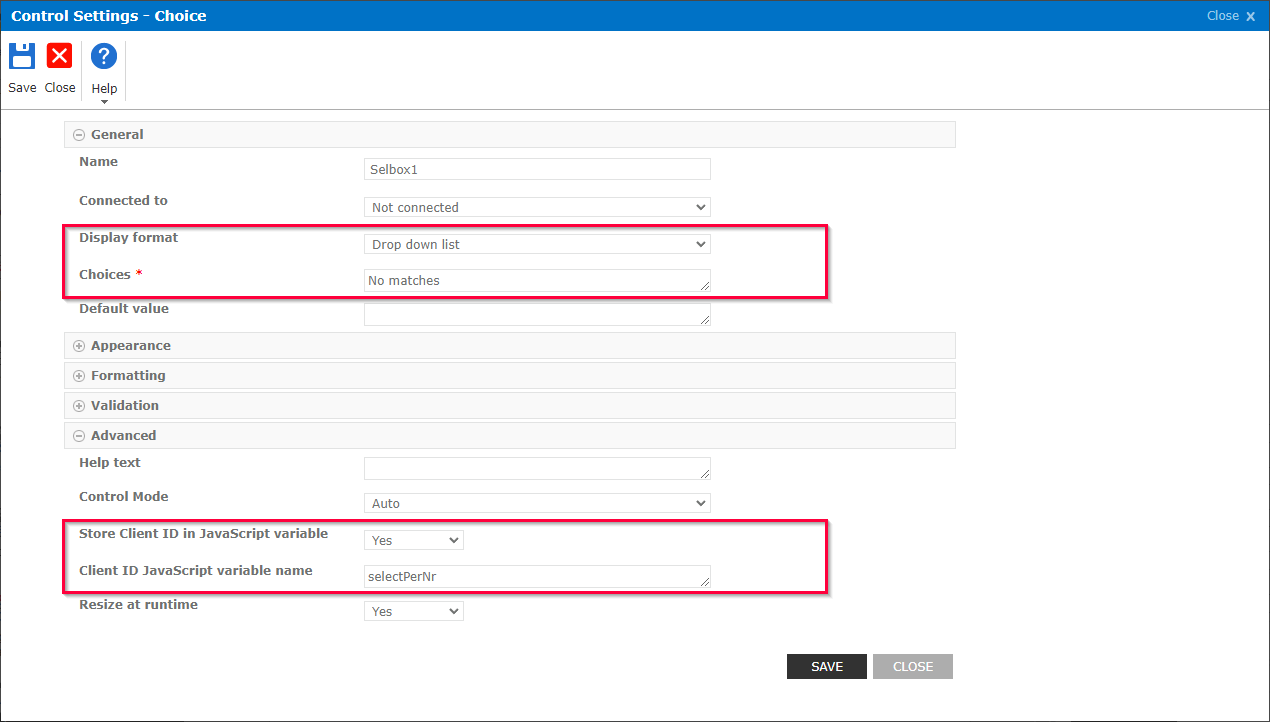
- Click [Save].
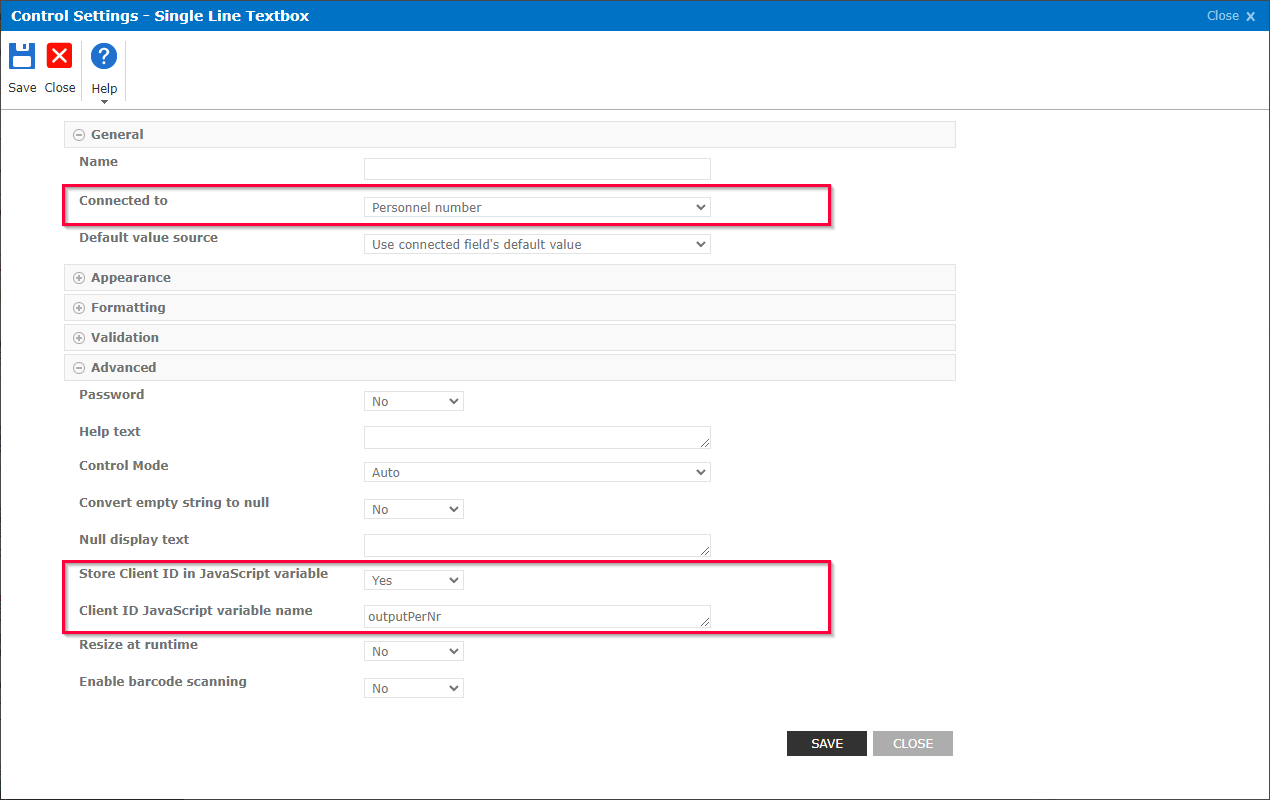
- Open the general settings of the field “Personnel No.” and set Connected to to the SharePoint column Personnel Number.
- Open the advanced settings of the field “Selected Material” and set Store Client ID in JavaScript Variable to Yes.
- In the field Client ID JavaScript variable name enter the variable name “outputPerNr”.
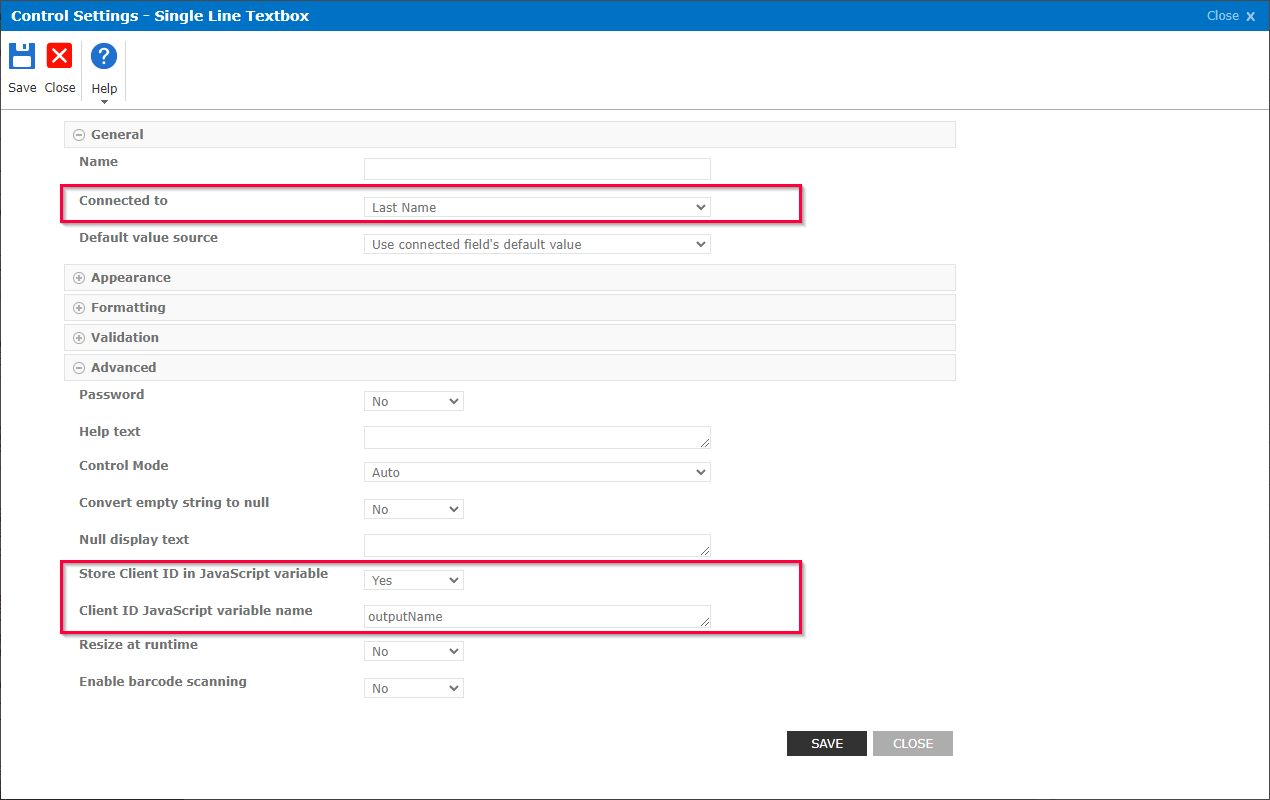
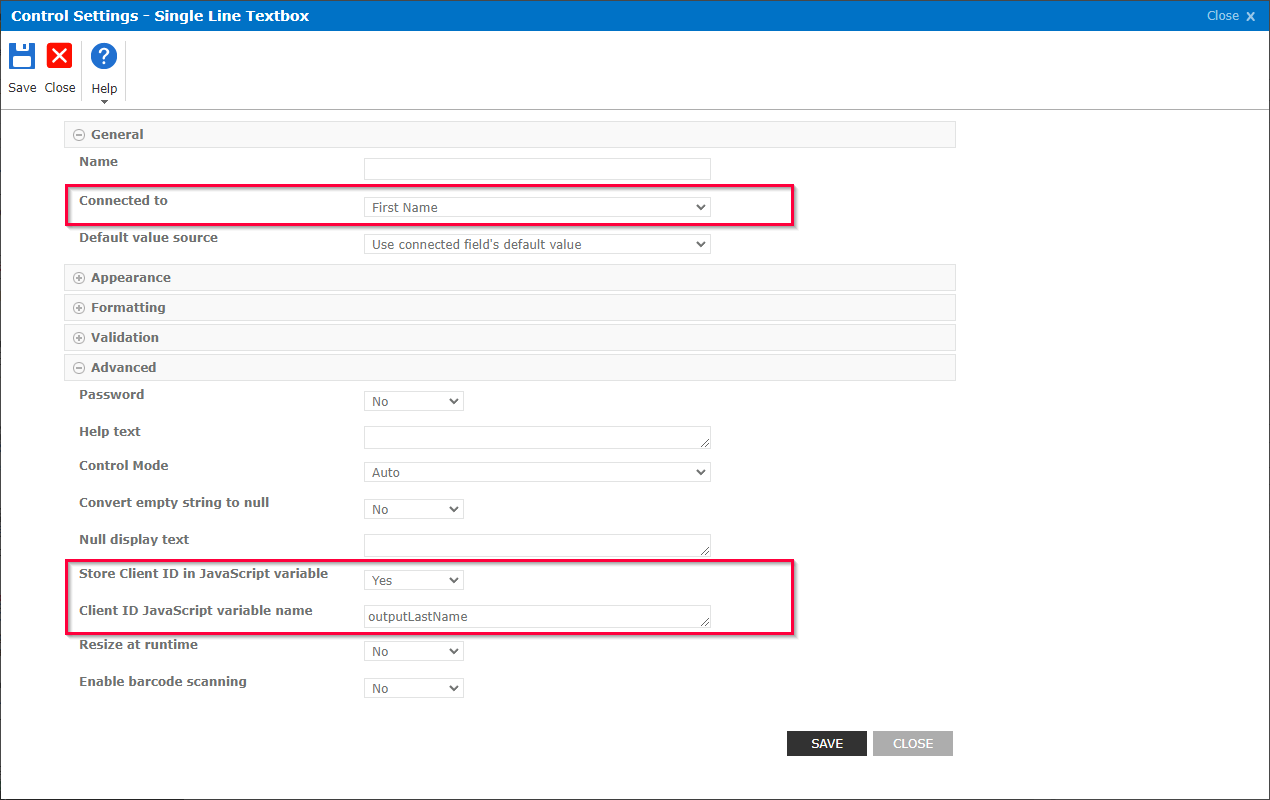
- Open the general settings of the field “Last Name” and set Connected to to the SharePoint column Last Name.
- Open the advanced settings of the field “Selected Material” and set Store Client ID in JavaScript Variable to Yes.
- In the field Client ID JavaScript variable name enter the variable name “outputName”.
- Open the general settings of the field “First Name” and set Connected to to the SharePoint column First Name.
- Open the advanced settings of the field “Selected Material” and set Store Client ID in JavaScript Variable to Yes.
- In the field Client ID JavaScript variable name enter the variable name “outputFirstName”.
- Add a [Save] and [Cancel] button to the form.
Integrating JavaScript Code in Nintex #
The JavaScript library for REST services by Theobald Software enables the use of yunIO services via JavaScript.
The depicted example uses the following JavaScript code for the following:
- To import the JavaScript library for REST services.
- To connect to yunIO.
- To run the service “QueryTablePA0002” that reads HR master data from the SAP table PA0002.
document.addEventListener("DOMContentLoaded", async () => {
    let yunioClient = await import(
        "https://static.theobald-software.com/theobald.yunio.client.js/dist/theobald.yunio.client.js"
    );


    yunioClient.TheobaldYunioClient.initializeLiveCombobox({
        $: NWF$,
        controls: {
            inputId: inputPerNr,
            selectId: selectPerNr,
            outputId: outputPerNr,
            descriptionId: outputFirstName,
            additionalInfoId: outputName
            /*buttonId: 'buttonId'*/
        },
        tableSettings: {
            serviceName: "QueryTablePA0002",
            idField: "PERNR",
            descriptionField: "VORNA",
            additionalInfoField: "NACHN"
        },
searchOptions: {
   extraWhereConditions: "AND ENDDA LIKE '99991231'"
},
        connection: {
            url: "https://yunio.example.com:8175/",
            /* future apiKey */
            username: prompt("yunIO username", ""),
            password: prompt("yunIO password", "")
        }
    });
});
To use this script in your application, replace the connection URL. If your yunIO service has a different name or settings, edit the table settings accordingly.
Note: Do not use // for comments in the custom java script, as // causes errors. Follow the steps below to integrate the script in your Nintex Form:
- Open the settings of the Nintex form and copy the JavaScript into the field Custom JavaScript.

- Click [Save].
Running the Nintex Form #
- Preview or publish the Nintex form.
- When prompted, enter your username and password to establish a connection to yunIO.
- Enter a personnel number. The hits for the entry are read from SAP and displayed in the dropdown list “Suggested personnel no.”.
- Select an employee from the dropdown list. The first and last name of the selected employee is displayed in the fields “First Name” and “Last Name”.
- Click [Save] to write the name and personell number of the selected employee to your SharePoint custom list.