Warning: Deprecated articles
You are using the old version of the knowledge base for yunIO.
Make sure to use the samples within the new HelpCenter for yunIO.
The following article shows how to integrate a yunIO services via the Nintex Gateway.
The Nintex Gateway is an on-premises application that enables Nintex Automation Cloud to access on-premises resources.
Prerequisites #
- Install and configure the Nintex Gateway.
- Make sure that the Nintex Gateway has a valid API key for authentication.
- Install yunIO version 1.26.3 or higher.
- Set up Basic Authentication in yunIO, see Online Help: Access Control.
Creating a yunIO Service for Nintex Gateway #
- Create a service in yunIO. The depicted example uses the BAPI SD_RFC_CUSTOMER_GET to search and extract customer data from SAP.
- Click
 to testrun the service in yunIO (1). For more information, see Online Help: Testing a Service.
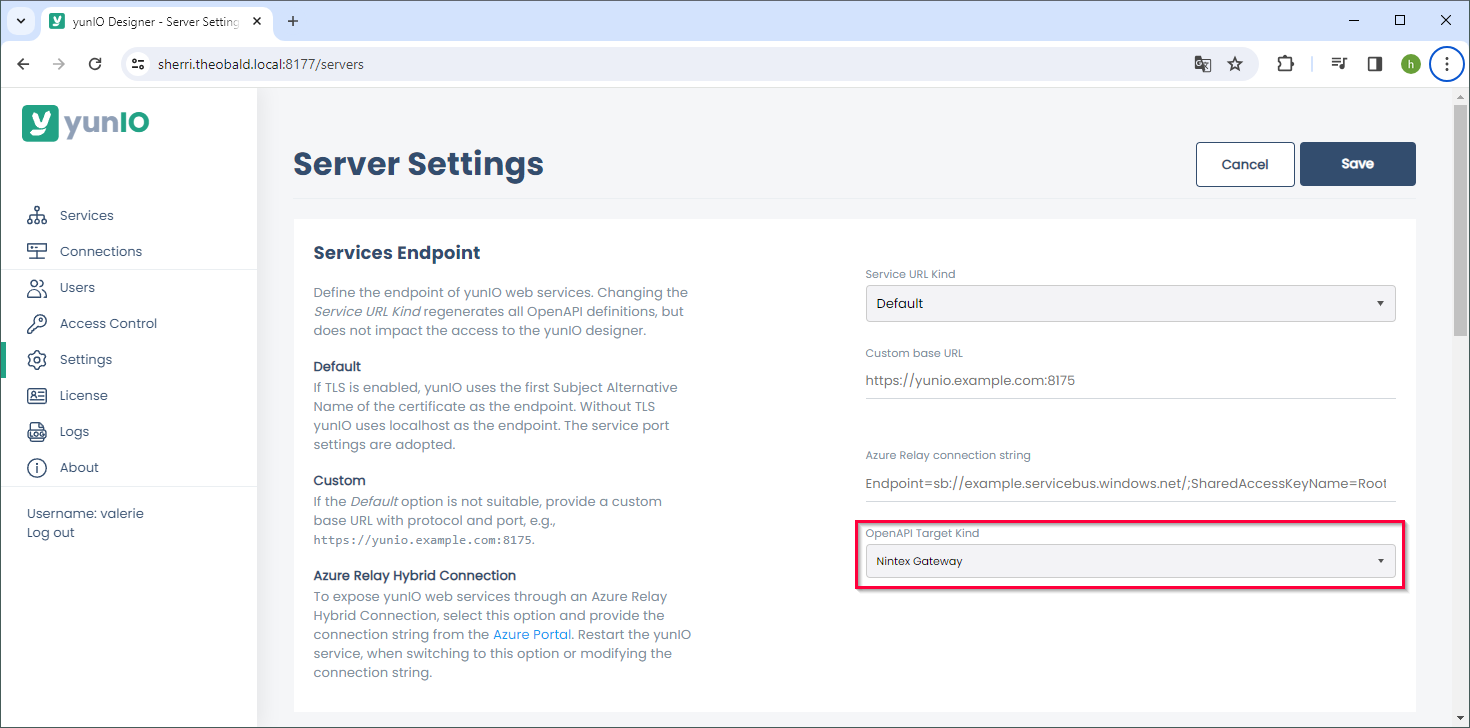
 - Navigate to Settings and select Nintex Gateway as the OpenAPI Target Kind to add predefined Nintex Gateway properties to the service definition.
- Navigate to Services and click
 to download the service definition (2).

- Open the service definition and check if the following properties are available at the end of the service definition:
"securityDefinitions": {
     "basic": {
         "type": "basic",
         "x-ntx-connection-properties": {
             "type": "object",
             "required": [
                 "x-ntx-gateway-id",
                 "x-ntx-gateway-apikey",
                 "x-ntx-gateway-xtension-baseurl",
                 "username",
                 "password"
             ],
             "properties": {
                 "x-ntx-gateway-id": {
                     "type": "string",
                     "title": "Select Nintex Gateway"
                 },
                 "x-ntx-gateway-apikey": {
                     "type": "string",
                     "title": "Nintex Gateway API key"
                 },
                 "x-ntx-gateway-xtension-baseurl": {
                     "type": "string",
                     "title": "On-premises service URL",
                     "description": "Base URL of the web service.",
                     "pattern": "^(https?:\/\/[^\/?#]+)(?:[\/]|\/.+|)$"
                 },
                 "username": {
                     "type": "string",
                     "title": "On-premises application username"
                 },
                 "password": {
                     "type": "string",
                     "title": "On-premises application password"
                 }
             }
         }
     }
 },
 "security": [
     {
         "basic": []
     }
 ],
 "x-ntx-render-version": 2,
 "x-ntx-host": ""
}
Configuring a yunIO Xtension in Nintex #
- Open your Nintex Automation Cloud tenancy.
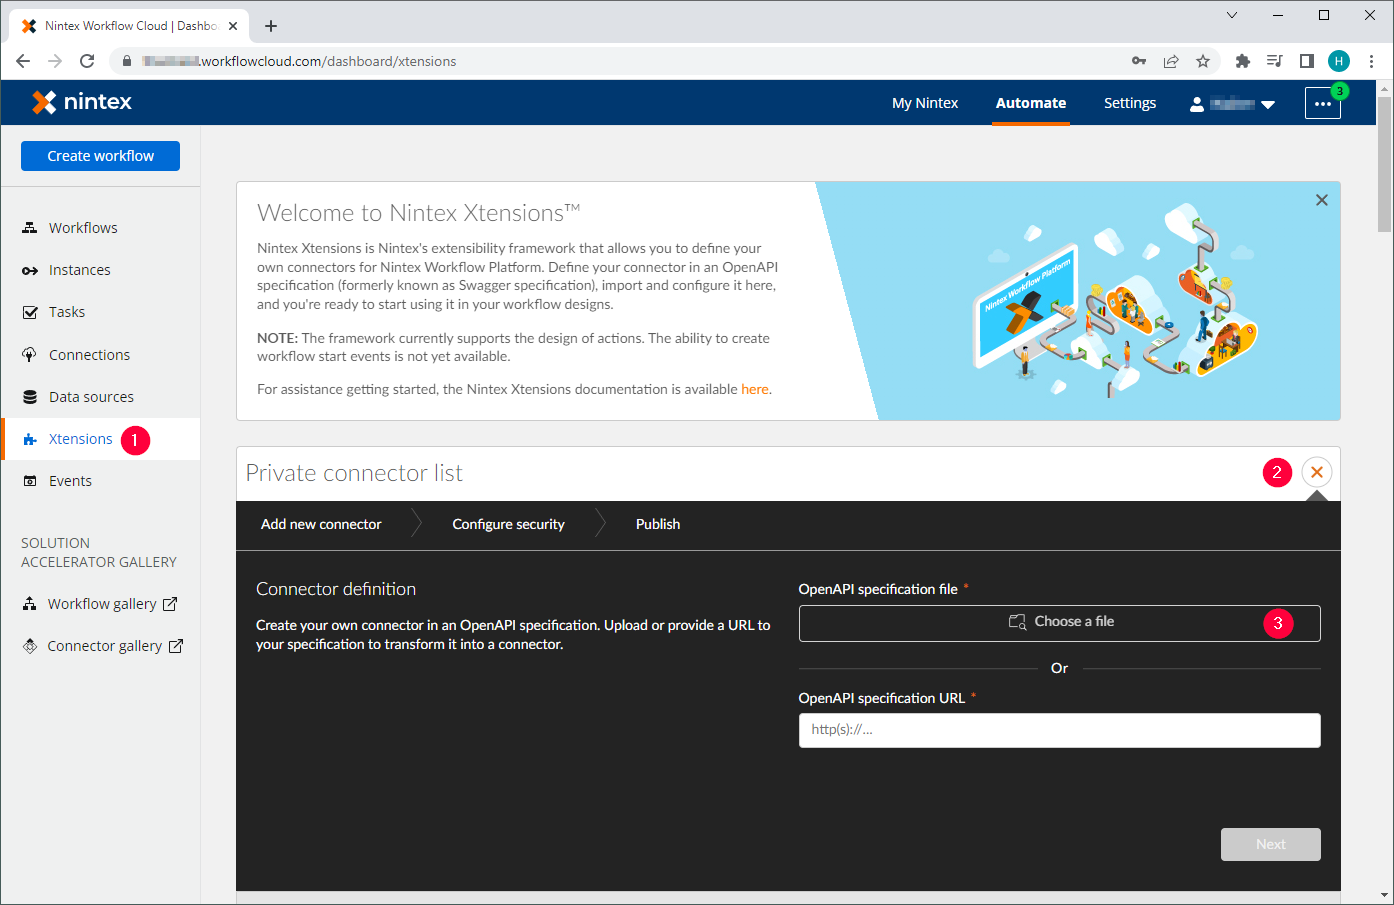
- Click Xtensions (1) in the dashboard to open the Xtensions page.
- Click
 (2) in the Private connector list.
 - Click [Choose a file] (3). Navigate to the yunIO service definition from Creating a yunIO Service for Nintex Gateway.
- Wait for the Nintex Automation Cloud to validate the file.
- Click [Next]. Nintex Workflow Cloud detects the basic authentication security template.
- Click [Next].
- Edit the Name of the Xtension. The entered name becomes the name of the action group in the workflow.
- Edit the Description of the Xtension. This appears in the Private connector list in the Xtensions page.
- Optional: select or upload an icon for the Xtension.
- Click [Publish] (4).

Configuring a yunIO Connection in Nintex #
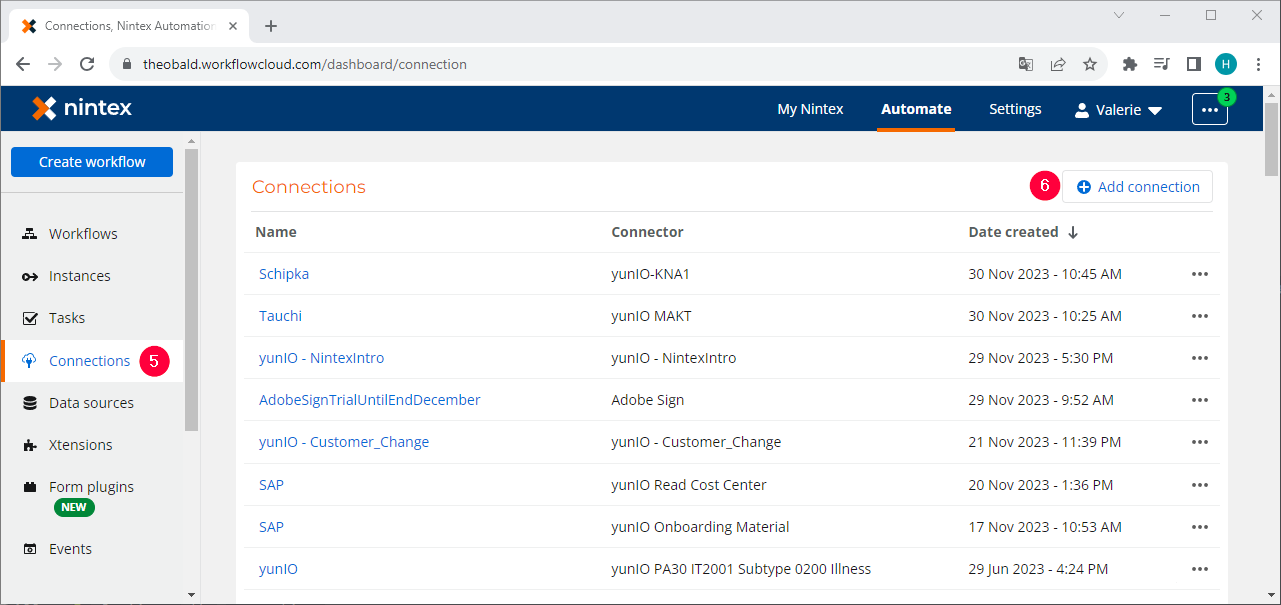
- Click Connections (5) in the dashboard to open the Connections page.
- Click [Add Connection] (6) in the Connector list.
- Select the yunIO connector from Configuring a yunIO Xtension in Nintex.
- Click [Next].
- Configure the connection:
- Connection name - enter a name to identify the connection.
- Select Nintex Gateway - select your Nintex Gateway.
- Nintex Gateway API key - enter a valid API key of your Nintex Gateway.
- On-premises service URL - enter the base URL of your yunIO service, including the HTTPS.
- On-premises application username - enter your yunIO username.
- On-premises application password - enter your yunIO password.
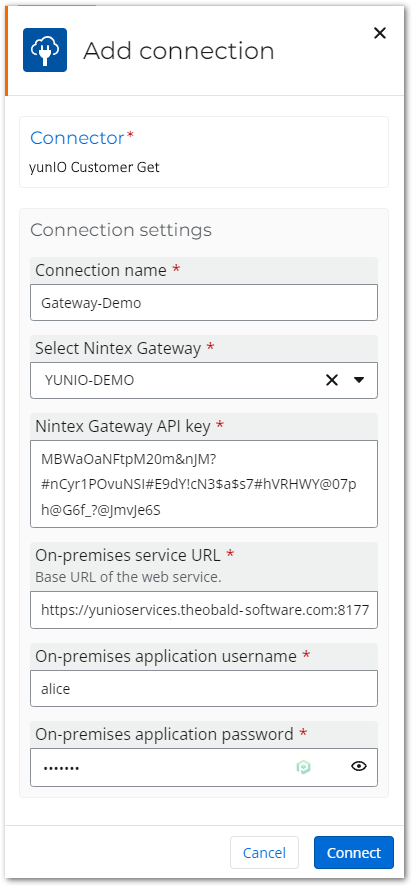
- Click [Connect].
Using the yunIO Service in a Nintex workflow #
After an Xtension and a Connection is created, the yunIO service can be used in a workflow.
- Drag&Drop the yunIO Xtension from Configuring a yunIO Xtension in Nintex into the workflow (7).
- Select the connection from Configuring a yunIO Connection in Nintex (8).
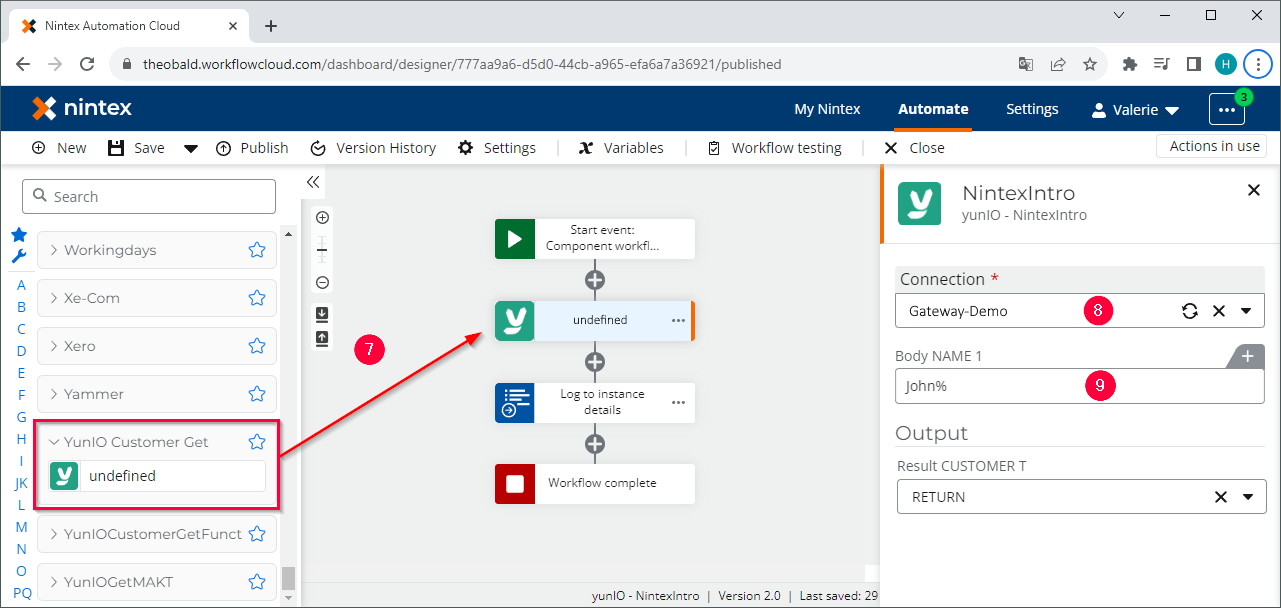
- Parameterize the input fields (9).