As of Xtract Universal Version 4.26.1, the command line tool xu-config.exe is available to customers in the installation directory of Xtract Universal, e.g. C:\Program Files\XtractUniversal\xu-config.exe.
The xu-config.exe tool creates extractions, sources and destinations outside of the Xtract Universal Designer.
The xu-config.exe tool supports the following extraction types:
Note: The xu-config.exe tool is EXPERIMENTAL and is in development. Beware of bugs and breaking changes!
Prerequisites #
- As of Xtract Universal 5.0.0, the xu-config.exe tool must be run by the same Windows AD account that runs the Xtract Universal Service.
This means, you either run the Windows command prompt as the respective user or you use the
runascommand in the command prompt. This is necessary, because passwords are encrypted for the user account that runs the xu-config.exe tool and can only be decrypted by the same account. - The execution of powershell scripts must be authorized on your system, see Microsoft Documentation: Managing the execution policy with PowerShell.
Creating an SAP Source using Windows Command Prompt #
The xu-config.exe tool only supports SAP connections with plain authentication.
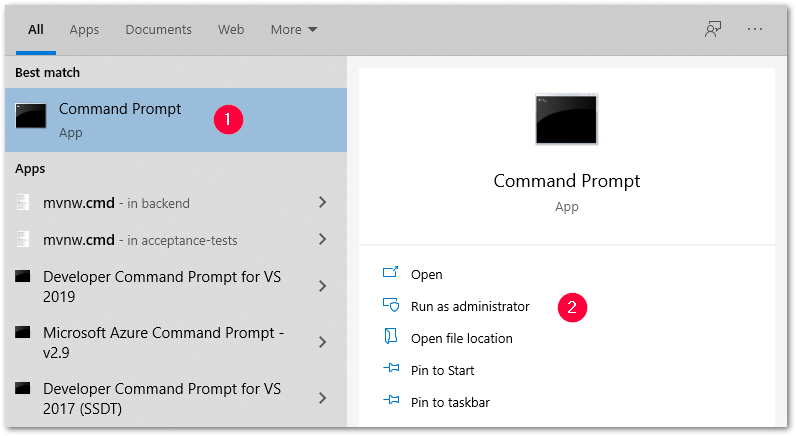
- Start the Windows command prompt application (1) with administrator rights (2).
- Navigate to the installation directory of Xtract Universal (3).
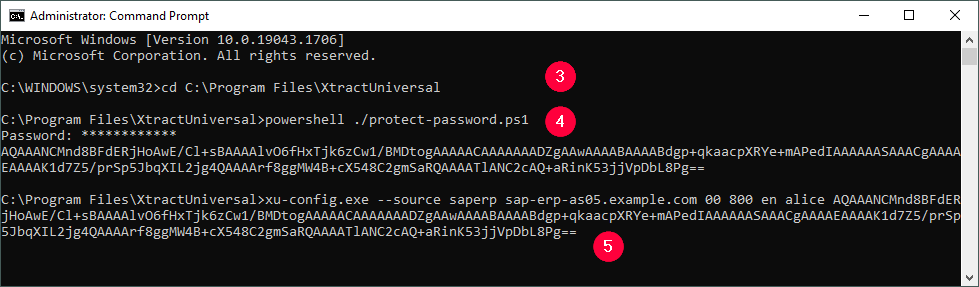
- Run the following shell command to create an encrypted password for your SAP source:
powershell ./protect-password.ps1(4). - Use the following command to select the
xu-config.execommand line tool from the Xtract Universal installation directory and to create a new SAP source:
xu-config.exe --source <name> <host> <instance-number> <client> <language> <user> <protected-password>. - Replace the parameters in
< >with actual values (5). The parameters are not case sensitive. - Press [Enter] to run the command.
- Check the generated source in the Xtract Universal Designer or in the following directory:
C:\Program Files\XtractUniversal\config\sources.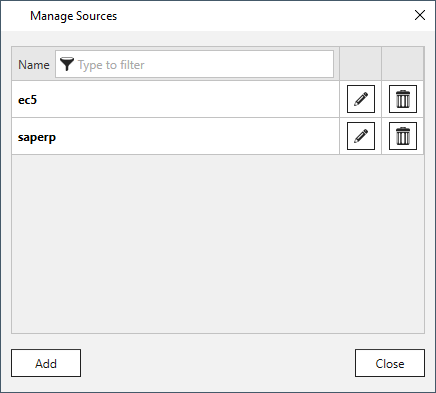
Creating a Destination using Windows Command Prompt #
Note: The xu-config.exe tool only supports the creation of the Azure Storage and Amazon AWS S3 destinations.
- Start the Windows command prompt application (1) with administrator rights (2).
- Navigate to the installation directory of Xtract Universal (3).
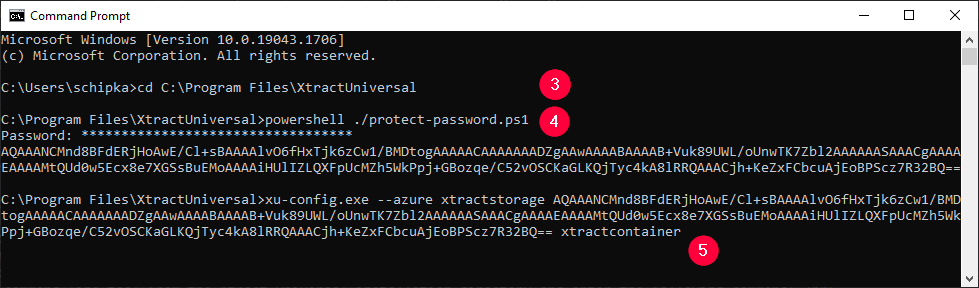
- Run the following shell command to create encrypted passwords or keys necessary for the destination:
powershell ./protect-password.ps1(4). - Use one the following commands to select the xu-config.exe command line tool from the Xtract Universal installation directory and to create a new destination:
- Azure Storage:
xu-config.exe --azure <account> <accesskey> <container> <folder(opt)>. - Amazon AWS S3 with user credentials:
xu-config.exe --s3 --auth user <key> <secretkey> <bucket> <region> <folder(opt)>. - Amazon AWS S3 with authentication via IAM role:
xu-config.exe --s3 --auth iam <bucket> <region> <folder(opt)>.
- Azure Storage:
- Replace the parameters in
< >with actual values (5). The names of the parameters are not case sensitive. - Press [Enter] to run the command.
- Check the generated destination in the Xtract Universal Designer or in the following directory:
C:\Program Files\XtractUniversal\config\destinations.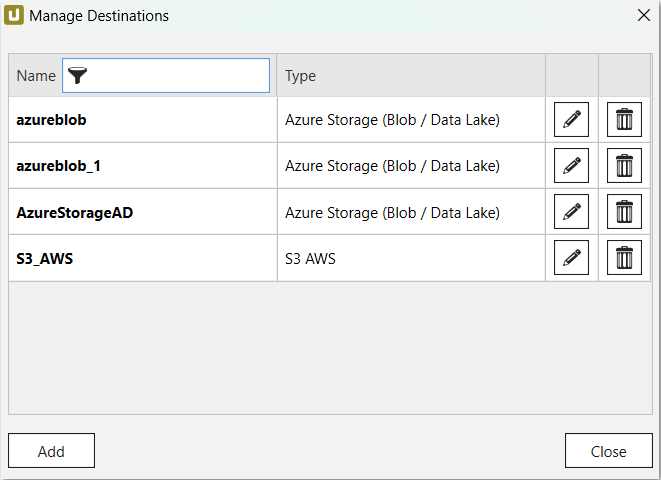
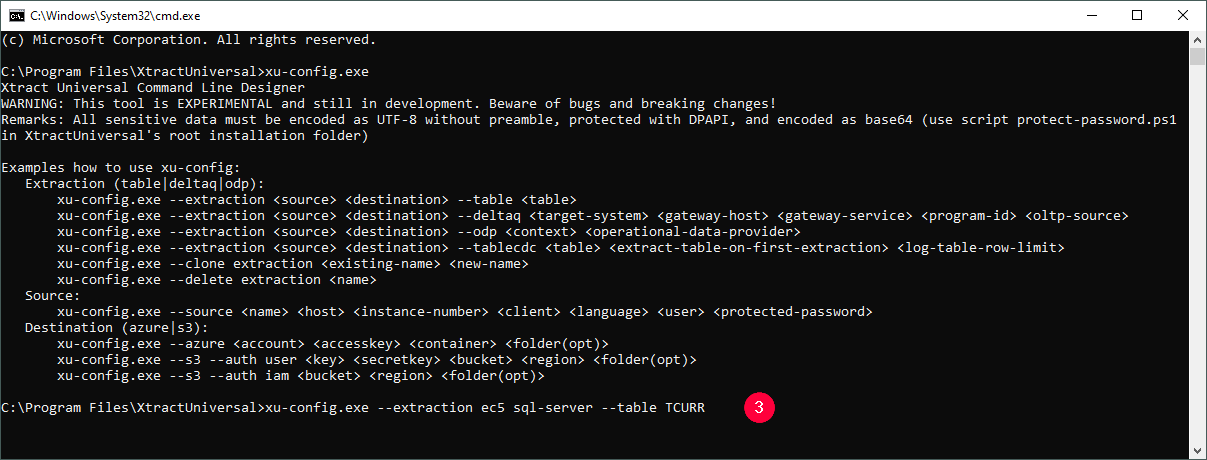
Creating a Table Extraction using Windows Command Prompt #
- Start the Windows command prompt application (1) with administrator rights (2).
- Navigate to the installation directory of Xtract Universal.
- Use the following command to select the xu-config.exe command line tool from the Xtract Universal installation directory and to create a new Table extraction:
xu-config.exe --extraction <source> <destination> --table <table>. - Replace the parameters in
< >with actual values (3). - Enter a defined SAP Connection, Destination and an SAP Table object for the parameters <source>, <destination> and <table>.
The names of the parameters are not case sensitive.
- Press [Enter] to run the command.
- Check the generated table extraction in the Xtract Universal Designer or in the following directory:
C:\Program Files\XtractUniversal\config\extractions.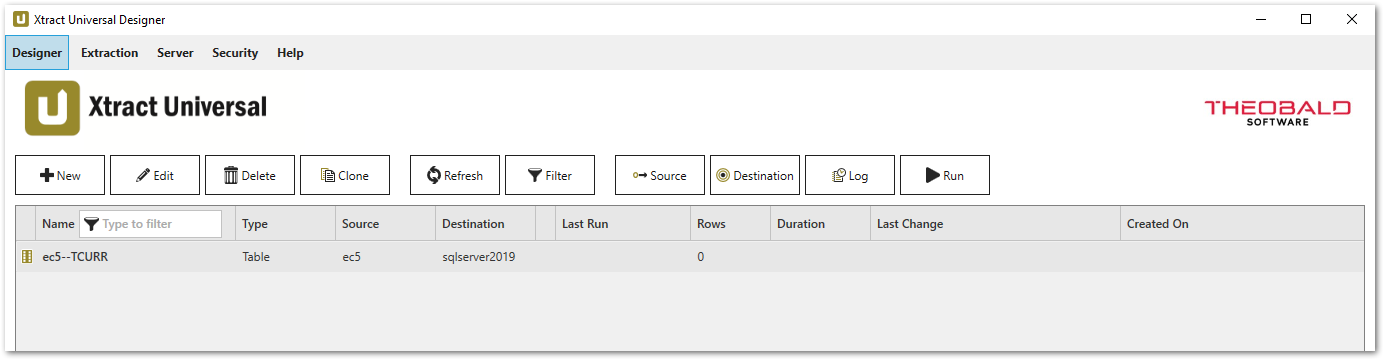
Note: The following table settings are set by default after creation: Package Size (50000), Extract data in background job (enabled), all columns are selected for output.
Tip: Use the command xu-config.exe -h to look up the syntax for Table, Table CDC, ODP and DeltaQ extractions.
Examples for all Extraction Types
| Extraction Type | Example Command |
|---|---|
| Table | xu-config.exe --extraction ec5 sql-server --table TCURR |
| DeltaQ | xu-config.exe --extraction ec5 sql-server --table TCURR |
| ODP (ABAP Core Data Services) | xu-config.exe --extraction bw2 sql-server --odp ABAP_CDS UCONRFC_ATTR$F |
| ODP (SAP NetWeaver Business Warehouse) | xu-config.exe --extraction bw2 sql-server --odp BW 0ADDR_SHORT$T |
| ODP (SAP HANA Information Views) | xu-config.exe --extraction S4H sql-server --odp HANA HCCT232H1KHY32F7UL59IH224$F |
| ODP (DataSources/Extractors) | xu-config.exe --extraction ec5 sql-server --odp SAPI 2LIS_11_VAITM |
| Table CDC (extract table on first run) | xu-config.exe --extraction ec5 csv --tablecdc KNA1 true 5000 |
| Table CDC (do not extract table on first run) | xu-config.exe --extraction ec5 csv --tablecdc KNA1 false 10000 |
Creating multiple Table Extractions using a PowerShell-Script
Multiple extractions can be generated semi automatically using suitable scripts. The scripts for creating extractions can be used to contribute to the generation of an SAP data warehouse.
Example:
# read table list
$tableList = "KNA1","LFA1","MARA","CSKT","SKA1"
# set the path to the installation folder
$XUConfig = 'C:\Program Files\XtractUniversal\xu-config.exe'
# source sytem
$source = "ec5"
# destination
$destination = "sqlserver2019"

# loop the tables
foreach ($tableName in $tableList) {
    # create the extraction e.g.
    # xu-config.exe --extraction ec5 sqlserver2019 --table KNA1
	Try {
		write-host -f Green "$tableName : Creation of Extraction is starting "  (Get-Date)
	    &$XUConfig --extraction $source $destination --table $tableName

	    # check the last exit code
	    # 0: successful
	    # else unsuccessful
	    if($LASTEXITCODE -eq 0) {
			write-host -f Green "$tableName : Creation of Extraction  is successful"  (Get-Date)
	    } else {
	        write-host -f Red "$tableName : Creation of Extraction failed with error code $LASTEXITCODE!"  (Get-Date)
	        #Write-Host $errorMessage
	    }
	}
	Catch {
		write-host -f Red "$tableName : Creation of Extraction failed with Exception ! " + (Get-Date)  $_.Exception.Message
	}
}