The following article shows how to connect to the Azure Storage destination using Authentication via Azure Active Directory.
The article leads you through the following process:
- Register a new app with your Azure AD tenant.
- Assign access rights for the new app in Azure Storage using the Storage Blob Data Contributor role.
- In Xtract Universal, connect to Azure Storage using the Azure Active Directory method.
App Registration #
Follow the steps below to register a new app with your Azure AD tenant:
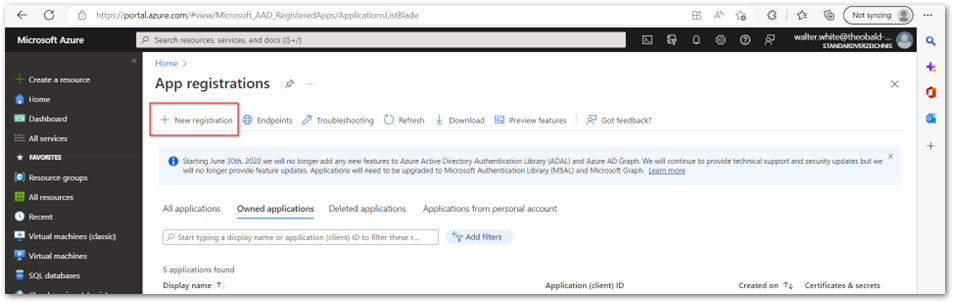
- Open the Azure portal and navigate to App Registrations.
- Click [New registration] to register a new app with your Azure AD tenant.
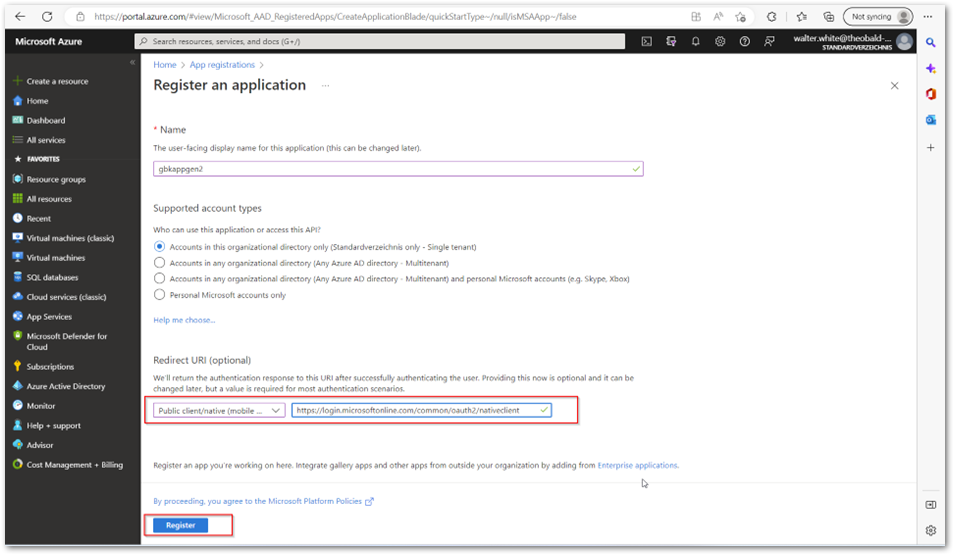
- Enter the name of the application.
- In the Redirect UI section, select Public Client /native (mobile and desktop) and assign
https://login.microsoftonline.com/common/oauth2/nativeclientas the redirect URI. - Click Register.
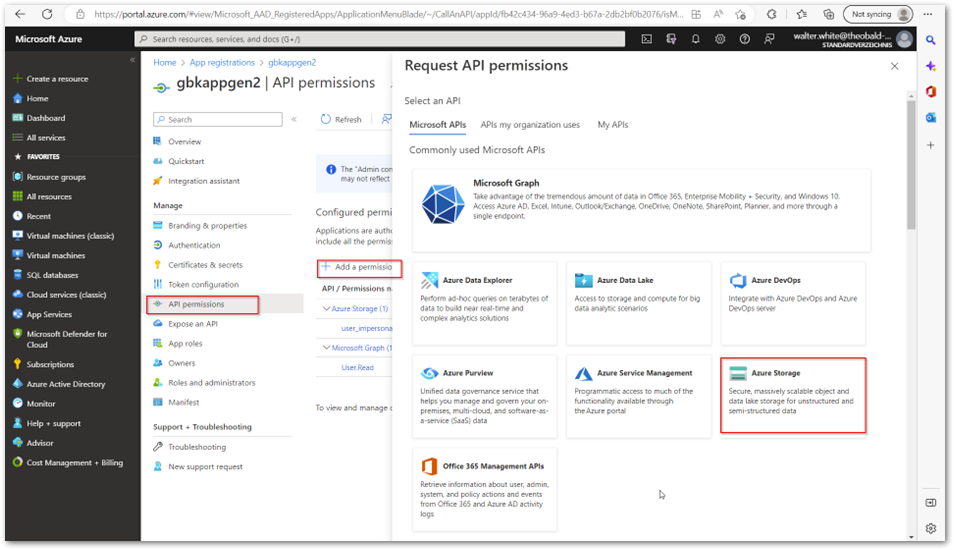
- Open the new application and navigate to API Permissions > Add a permission > Azure Storage.
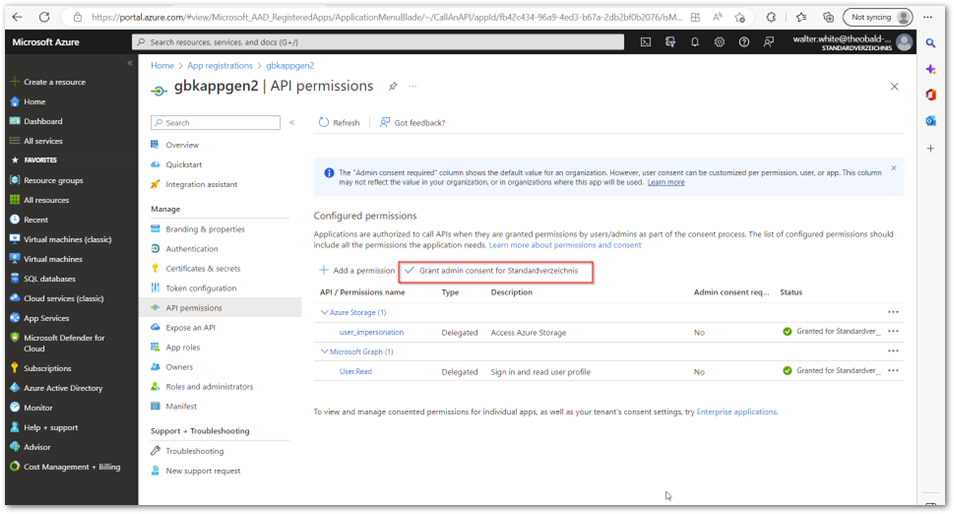
- Click Grant admin consent.
Access Rights in Azure Storage #
Follow the steps below to assign access rights for the new Azure app in Azure Storage using the Storage Blob Data Contributor role:
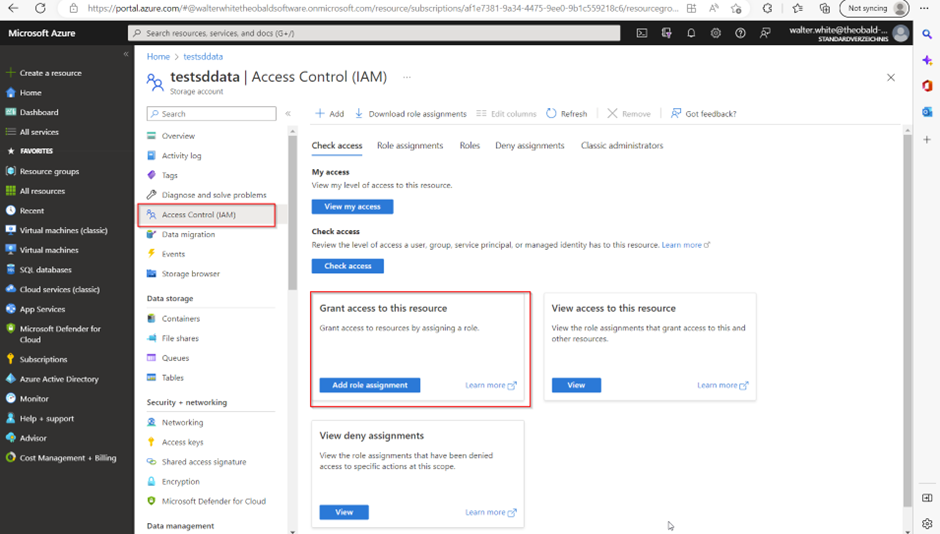
- Open the Azure portal and navigate to Access Control (IAM).
- Click [Add role assignment].
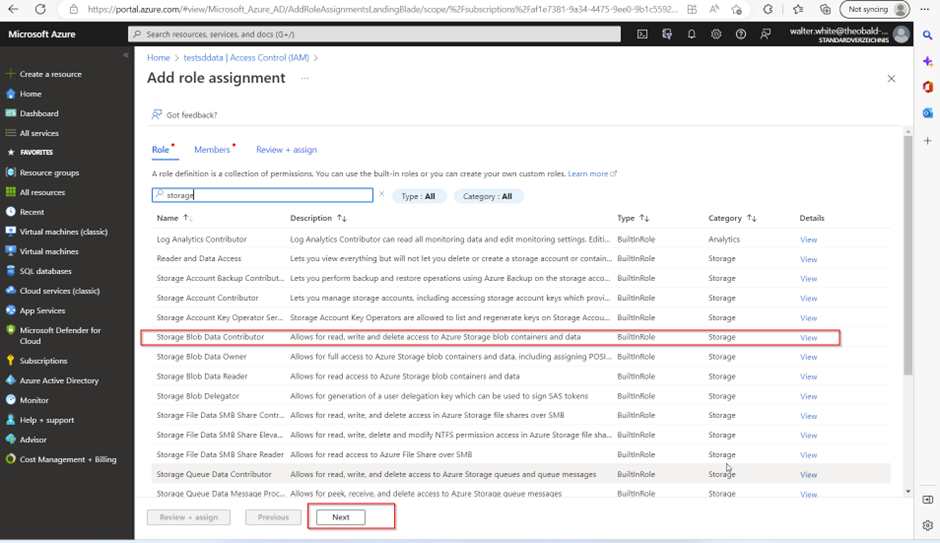
- Select the Storage Blob Data Contributor role and click [Next].
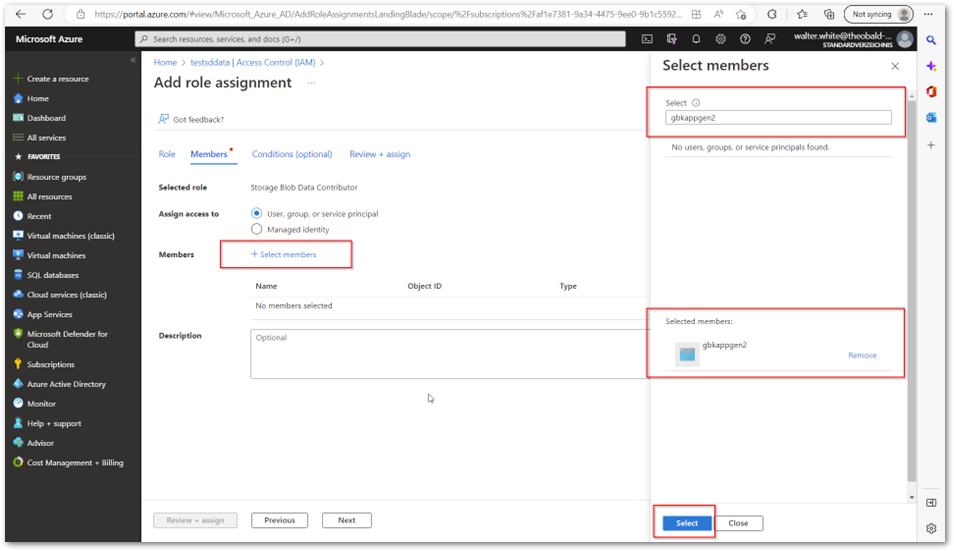
- Click + Select members and add the new Azure app created in App Registration to the members.
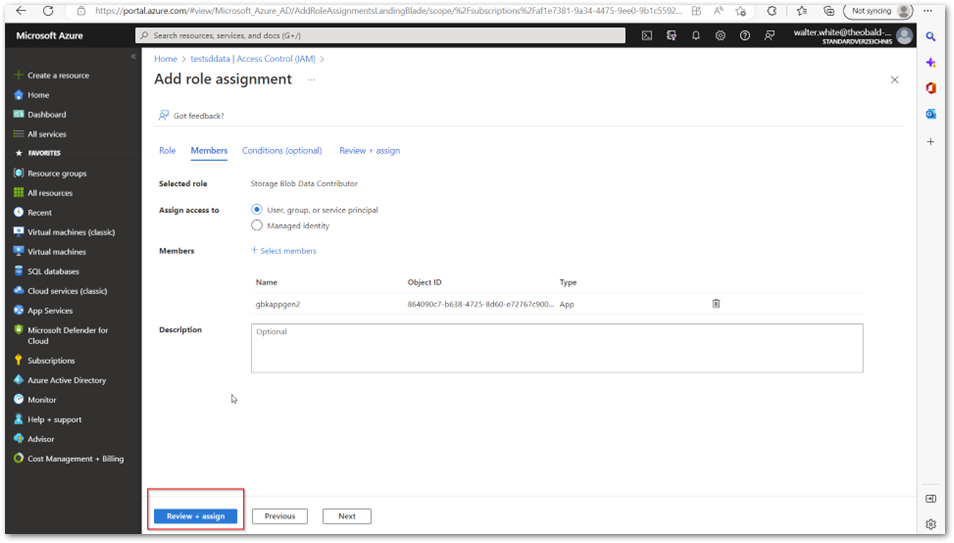
- Click [Next] to continue, then click [Review + assign] to assign the access rights.
Connect to Azure Storage with Xtract Universal #
Follow the steps below to connect Xtract Universal to the Azure Storage destination using Authentication via Azure Active Directory:
- Open Xtract Universal and create a new Azure Storage destination or edit an existing destination.
- Select the connection type Azure active directory.
- Enter the name of your storage account.
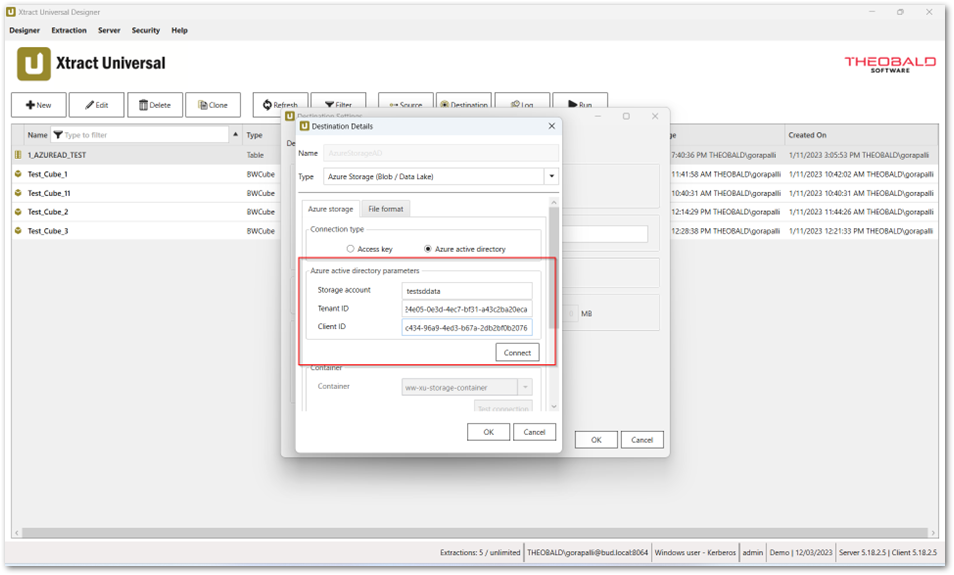
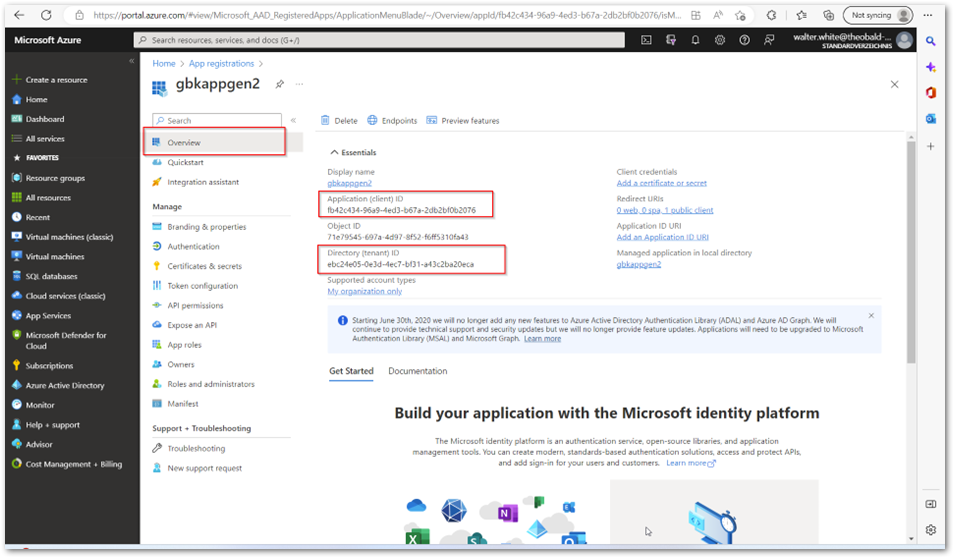
- Copy and paste the Application (client) ID and the Directory (tenant) ID from the Azure app created in App Registration.
- Click [Connect]. The window “Azure OAuth 2.0” opens.
- When prompted, pass your Active Directory credentials and click [Accept].
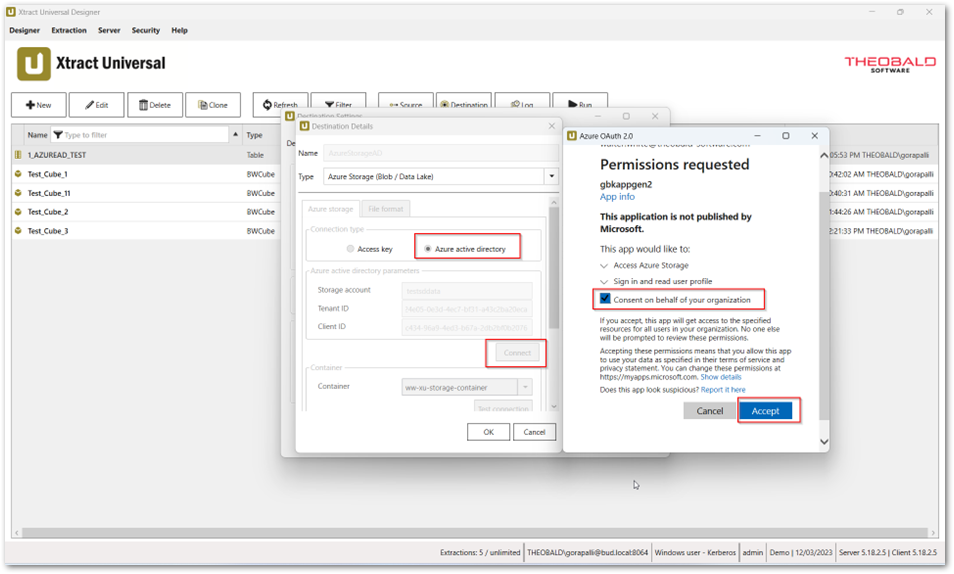
- If the connection is successful, a “Connection successful” message is displayed in a pop-up window.