The following article shows how to set up Single Sign-On (SSO) with Secure Network Communication (SNC) and External ID.
SSO with External ID uses a Personal Security Environment (PSE) to create a trust relationship between the SAP application server and the service account that runs Xtract Universal.
This allows Xtract Universal to impersonate any SAP user.
Note: SSO with External ID is only supported by Xtract Universal and Board Connector.
Requirements #
The usage of SSO with External ID requires:
- The Xtract Universal service must run under a Windows AD Service account, see Run an Xtract Universal Service under a Windows Service Account.
- Access to the Xtract Universal Designer and the Xtract Universal server must be restricted to Windows AD users, see Restrict Access to Windows AD Users (Kerberos Authentication).
- Windows AD users must be mapped to SAP users in the SAP table USRACL, see SAP Help: User Authentication and Single Sign-On.
- The SAP CommonCryptoLib must be installed on the machine that runs Xtract Universal, see SAP Note 1848999.
Copy the library (sapcrypto.dll) and the command line tool (sapgenpse.exe) to a local directory, e.g.C:\PSE\. For more information, see SAP Help: Downloading and Installing the SAP Cryptographic Library. - The environment variables SECUDIR and SNC_LIB must be set to the PSE directory that contains the SAP CommonCryptoLib.
For more information on PSE, see SAP Help: Creating PSEs and Maintaining the PSE Infrastructure.
The Process #
SSO with External ID uses an X.509 certificate & PSE to create a trust relationship between the SAP application server and the service account that runs Xtract Universal. This allows Xtract Universal to impersonate any SAP user.
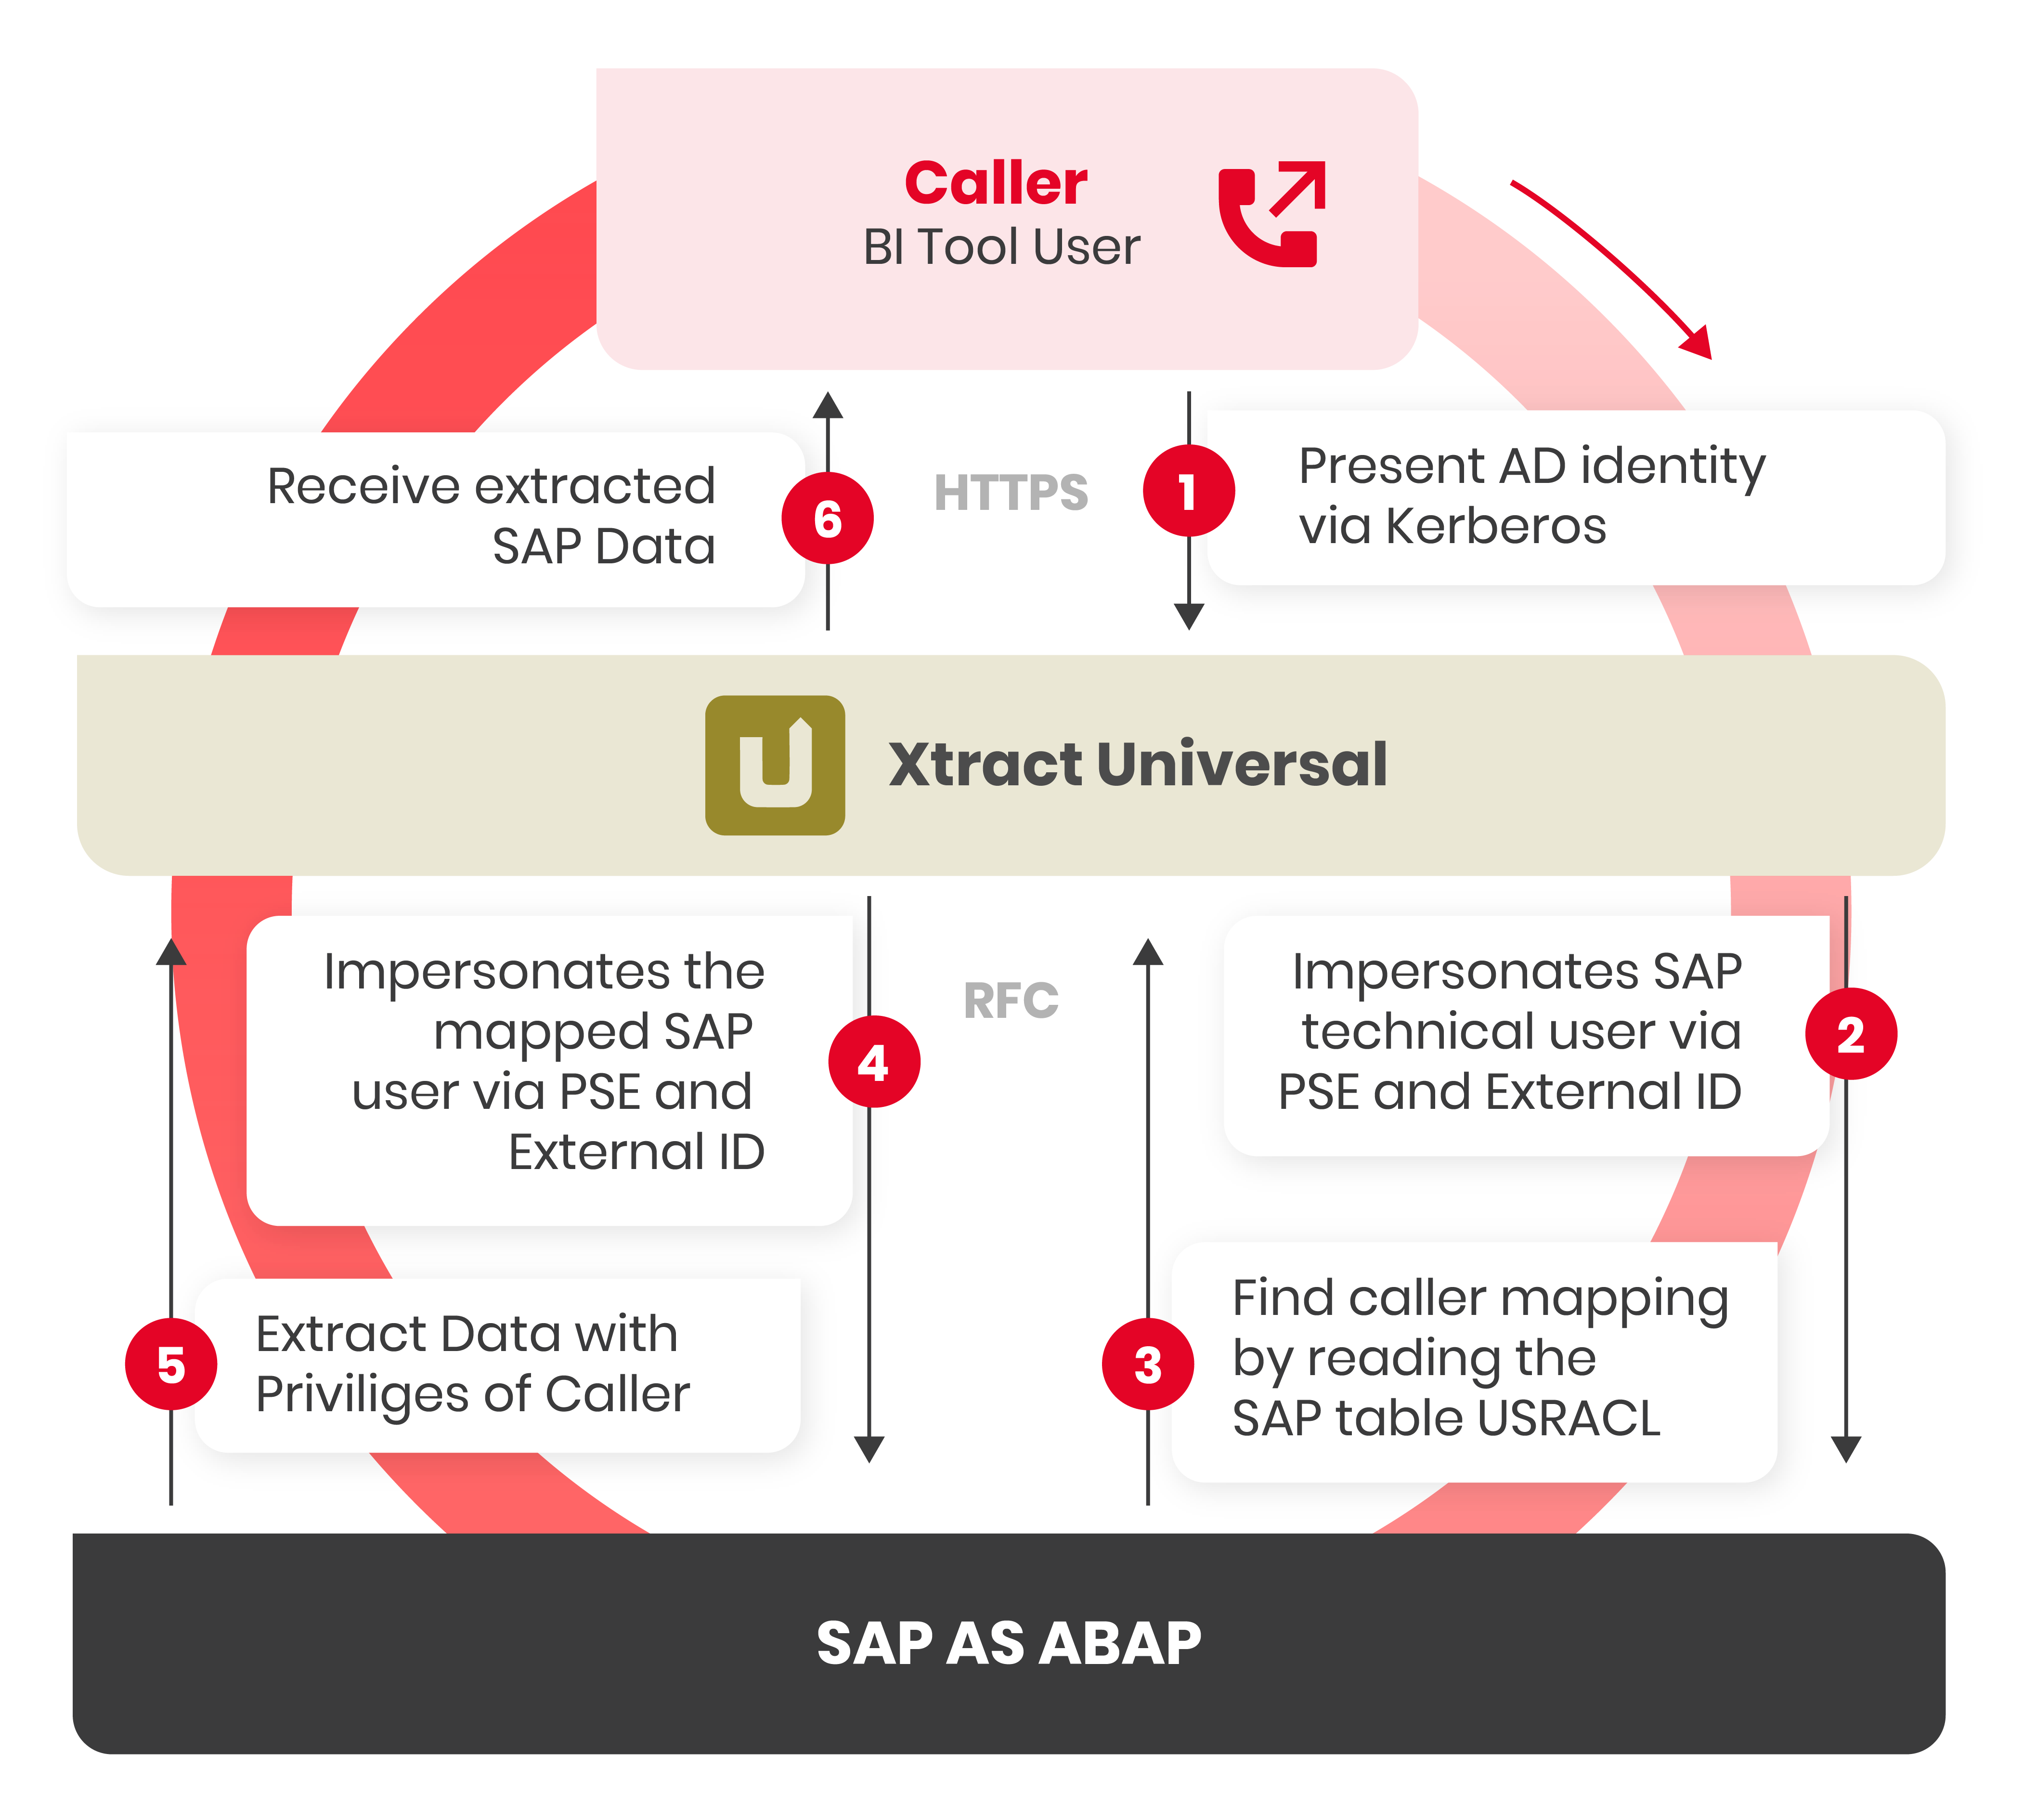
- Users authenticate themselves against Xtract Universal via Active Directory (Kerberos) and request data from SAP.
- Xtract Universal opens an RFC connection via SNC and uses PSE & External ID for authentication.
- Xtract Universal reads the SAP table USRACL to determine the SAP user that is mapped to the Active Directory user from step 1.
- Xtract Universal then impersonates the mapped SAP user to request the SAP data via SNC.
- Xtract Universal retrieves the requested SAP data with the privileges of the caller.
- Xtract universal loads the extracted SAP data to the tool that triggered the extraction.
Setup in SAP #
- Use the SAPGENPSE command line tool to generate an X.509 certificate for the Windows service account that runs Xtract Universal.
Use the following command to create the certificate:sapgenpse gen_pse -p theo-xu.pse.
The distinguished name of the PSE owner can be the fully qualified hostname of the Xtract Universal server, e.g.,CN=xuserver.example.com. - Use the command
sapgenpse export_own_cert -v -p theo-xu.pse -o theo-xu.crtto export the certificate. - Use SAP transaction STRUST to add the certificate to the list of trusted PSE certificates, see SAP Help: Adding Certificates to PSE Certificate Lists.
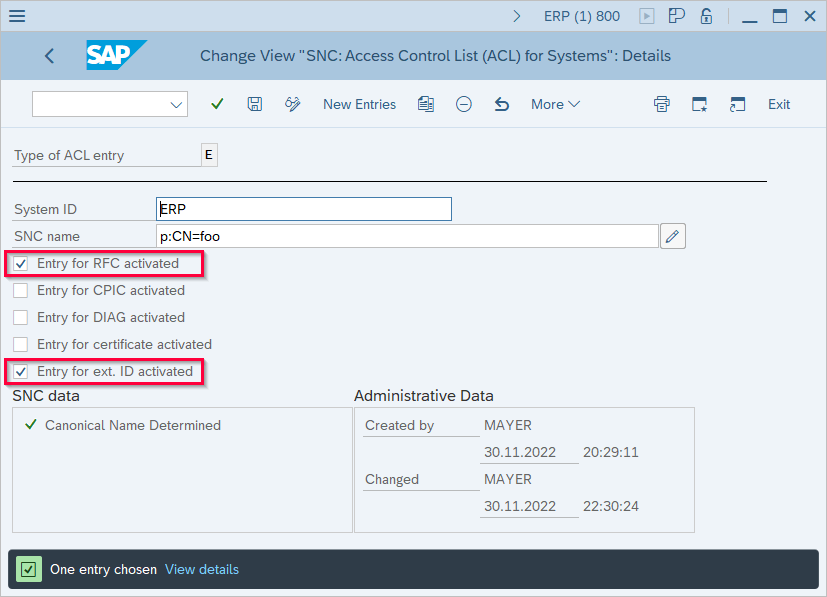
- Use SAP transaction SNC0 to create an access control list item that allows RFC and external IDs for the Common Name (CN) of the certificate created in step 1.
- Use SAP transaction STRUST to export the server certificate of the SAP server, see SAP Help: Exporting the AS ABAP’s Public-Key Certificate.
- Copy the exported server certificate to the PSE directory of the machine that runs Xtract Universal.
- Use the SAPGENPSE command line tool to import the server certificate to the client PSE.
Example:sapgenpse maintain_pk -v -a server.crt -p theo-xu.pse - Use the command
sapgenpse seclogin -p theo-xu.pse –O SAPServiceUserto create a credentials file (cred_v2), see SAP Help: Creating the Server’s Credentials Using SAPGENPSE. The credentials file gives Xtract Universal access to the PSE without providing the password for the PSE.
The PSE directory should now contain the following files:
- the client PSE
theo-xu.pse - the client certificate
theo-xu.crt - the server certificate that was exported from your SAP system
[server].crt - the credentials file
cred_v2
Setup in Xtract Universal #
Create a new SAP source system in your Xtract product to set up SSO with External ID:
- Navigate to [Server > Manage Sources] in the main menu of the Designer. The window “Manage Sources” opens.
- Click [Add] to create a new SAP source.
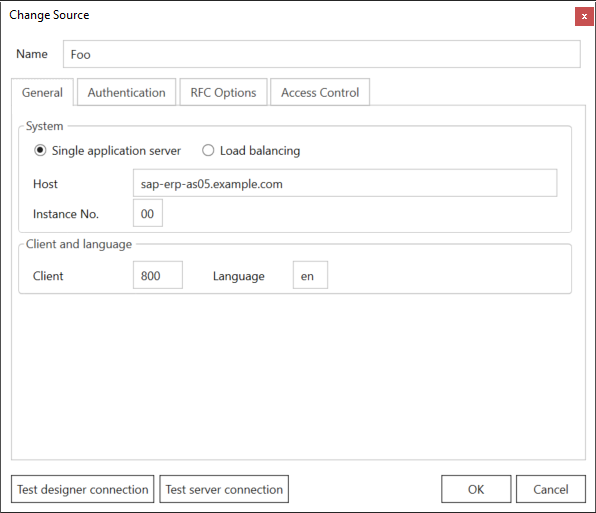
- Open the tab General and enter the connection details of your SAP system.
- Open the tab Authentication and activate the option Secure Network Communications (SNC).
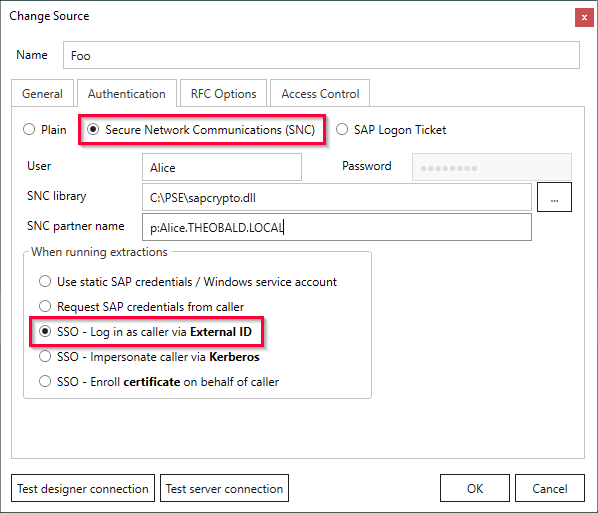
- Enter the name of an SAP user in the field User for the initial login with Xtract Universal.
This user must be a technical user (SAP user with security policy set to Technical User) and must have privileges to read the SAP table USRACL via the function module RFC_READ_TABLE. - Enter the complete path to the SAP cryptographic library in the field SNC Library, e.g.
C:\PSE\sapcrypto.dll. - Enter the SPN of the SAP service account in the field SNC partner name. Use the following notation:
p:[SPN]@[Domain-FQDN-Uppercase]. - Enable the option SSO - Log in as caller via External ID.
- Click [Test Connection] to verify your connection settings.
- Click [OK] to save your changes.