The following article is intended for users who want to run SSIS packages with SNC Authentication when DeltaQ or OHS dataflow components are used. When SNC is used, it is a prerequisite that the associated application server, RFC destination (SM59) and SAP user have set SNC via partner name. This way the communication between the application server and Xtract IS takes place via RFC destination for DeltaQ and OHS dataflow components.
User maintenance configuration #
In SU01, enter the User and click on [Change].
Go to SNC tab provide the SNC Name of the SAP user and click on [Save]. In our case, MALAPATI is the user and THEOBALD.LOCAL is the domain.
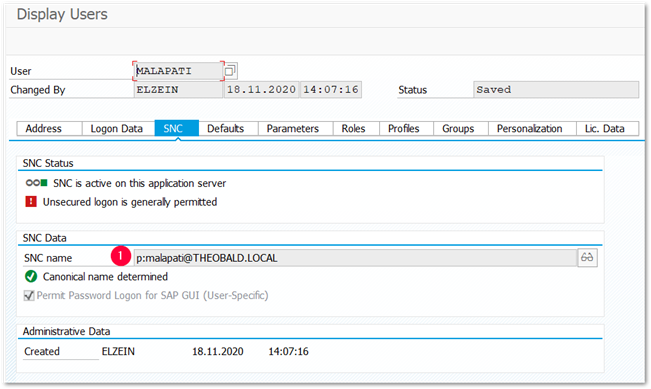
Make sure the SAP user used in Xtract IS is enabled with the SNC name (1) of the user.
SAP Source Settings #
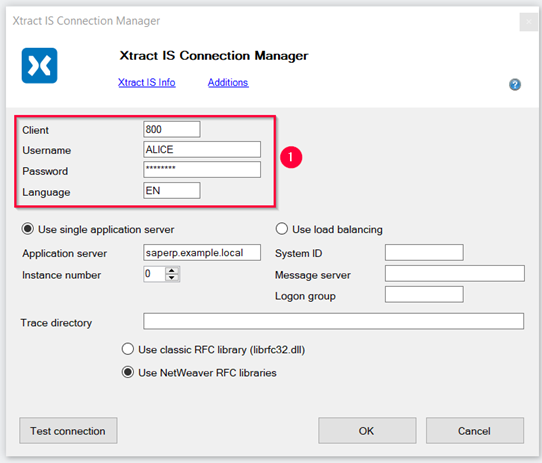
- Open the Connection Manager of the SAP connection.
- Provide the user details for which the SNC is enabled (1).
- Click on [Additions].
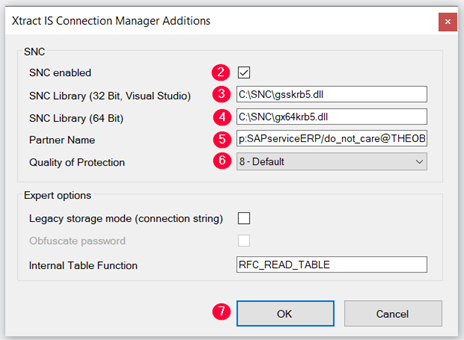
- Check the box SNC (2).
- Enter the complete path of the Kerberos library in the field SNC library 32 Bit (3).
- Enter the complete path of the Kerberos library in the field SNC library 64 Bit (4).
- Enter the SPN of the SAP service account in the field Partner name. Use the following notation: p:[SPN]@[Domain-FQDN-Uppercase] (5).
- Set the Quality of Protection as 8 - Default (6).
- Click [OK] (7).
- Click on [Test connection] (8), to test the successful connection. The confirmation window opens.
- Click on [OK] (9) to confirm.

Note: Here the Partner name of the Application server is entered and in our case it is p:SAPserviceERP/do_not_care@THEOBALD.LOCAL.
RFC destination configuration #
Enable SNC for the corresponding RFC destination regarding SPN of SAP User account. In the example, the RFC destination XTRACT10 is being used for enabling SNC
- In SM59 double-click on the already created TCP/IP RFC destination as explained in the online help Xtract IS – RFC Destination and go to change mode.
- In the Logon & Security tab, under Status of Secure Protocol, click on [SNC] and in the pop-up screen Change View SNC Extension: Details
- Provide the SPN (Service Principal Name) of SAP user account in the field Partners (1). In our case, the SNC Partner is p:RfcServer/Malapati@THEOBALD.LOCAL.
- Set the Quality of Protection to Default (2).
- Check the box SNC Active (3).
- Click on [Continue] (4).

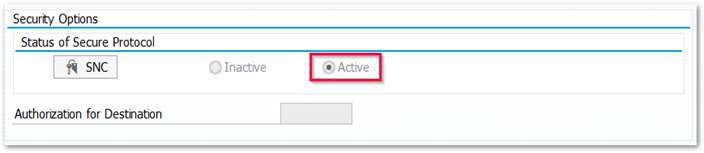
- Once the above step is successful you can see the Active status of SNC
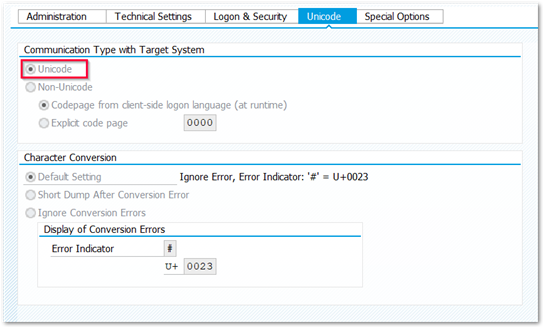
- Go to Unicode tab and select the Radio button Unicode and click on [Save].